|
Tomb Raider 4.5 Engine Patcher English | German |
|
Hauptseite
Downloads
Handbuch
DRACO patches
eSSe scripting
FAQ
Anti-TREP
Bugs Denkmal
Preset archive
Kontakt
TREP-Benutzerhandbuch (aktualisiert am 18. April. 2007)
Inhalt:
1.0
Einleitung
2.0
Worum geht's hier eigentlich?
3.0
Wichtige Anmerkungen
3.1
Anmerkung über die Farbgebung von Zahlen
3.2
Anmerkung für Levelbauer: Wie man seinem Level die modifizierte Engine mitgeben kann
3.3
Anmerkung über Voreinstellungen für Version 0.67 und später
3.4
"Waaah, wieso sind manche Optionen deaktiviert?" oder: Vom Nutzen der Option "Extend tomb4.exe size"
3.5
Systemanforderungen für die gepatchte Engine
4.0.
Los geht`s…
5.0.
TREP main window
5.1.
Main window — video / audio settings
5.2.
Increase enemy / object limits & relocate target buffer options
5.3.
Increase per-mesh vertex limit
5.4.
Increase flyby sequence limit
5.5.
Increase statics limit
5.6.
Remap particle buffer
6.0.
Video / audio settings' sub-sections
6.1.
Bar Customizer
6.2.
Font Customizer
6.3.
Credits Sub-Customizer & Credits text editor
6.4.
GFX Customizer 1
6.5.
GFX Customizer 2
6.6.
Light Customizer
6.7.
Camera Customizer
6.8.
Sound Customizer
7.0.
Main window — gameplay options
7.1.
Extended tomb4.exe section chart
8.0.
Gameplay options — sub-sections
8.1.
Enemy HP Customizer
8.2.
Physics Customizer
8.3.
Inventory Customizer
8.4.
Item Configurator
8.5.
Weapon Customizer
8.6.
Damage / HP Customizer
8.7. SAS grenades bugfix
8.8.
Limits Sub-Customizer
8.9.
Object (trap) Customizer
9.0. Flipeffect Editor
and FURR Language command system — learning the basics
9.1.
Command reference
9.2.
Conditional directives reference
9.3.
How to create ELSE_IF sequences with conditional directives
10.0.
Race Timer Editor — bringing thrill to your levels
10.1.
Race Timer Workaround
10.2.
Trick: how to create one-shot flipeffect with Flipeffect Editor and Race Timer
Editor.
11.0. DRACO custom patch module
12.0. Advanced scripting with TREP
1.0 EINLEITUNG
Wir drehen das Rad der Zeit zurück und schreiben den 24. November 2005. Es ist der Tag, an dem die erste Version des TREP (0.2 alpha) veröffentlicht wurde:
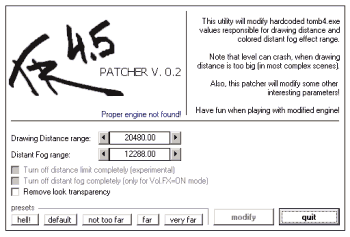
Damals schlicht "TR 4.5 Patcher" genannt, war es eine ungeschlachte Anwendung voller Bugs, die bloß drei lumpige Optionen anzubieten hatte. Seither hat sie sich entwickelt zu einem komplexen Patch-System mit Möglichkeiten zur flexiblen Flipeffekt- und Zeitmesserbearbeitung, mit Unterstützung von Voreinstellungen und eines Moduls zur Erstellung benutzerdefinierter Patches. Heute kann man mit TREP nahezu eintausend verschiedene sogenannte "hart codierte" Werte oder Parameter zugleich und in allen möglichen Kombinationen bearbeiten. Kann sein, dass einige dieser Parameter wahrhaft sinnlos und überflüssig sind; kann sein, dass die TR4-Engine immer noch nicht flexibel genug ist für eine vollständige Umwandlung und Aneignung von Funktionen anderer Versionen der TR-Engine; kann auch sein, dass gelegentlich immer noch Bugs auftreten – aber immerhin haben alle diese Optionen und Funktionen neuen Schwung ins TR-Levelbauen gebracht.
Nun befinden wir uns also im November 2006. Ein
Jahr ist vergangen seit dem Moment, da wir alle begonnen haben, tief ins Innere der TR4-Engine
vorzustoßen. Ich staune über den raschen Fortschritt und darüber, wie viele Funktionen seither
entdeckt worden sind. Unglücklicherweise sind meine eigenen Fähigkeiten zu gering, um die
Engine in irgendeinem wesentlichen Punkt zu verändern, zumindest aber habe ich versucht, einige
kleine "Code Patches" zu erstellen, um dadurch den einen oder anderen Aspekt des altbekannten
TR-Gameplays zu modifizieren, wie etwa unbegrenzte Munition für die Pistolen, Laras Lebenspunkte
oder die Physik der TR-Welt. In der Hauptsache geht es bei TREP aber nur um die Modifikation von
Konstanten der tomb4.exe, z. B. Feuerkraft und -geschwindigkeit der verschiedenen Waffen,
diverse Farben und so weiter. Ich hoffe, dass andere mehr Erfolg bei dieser Arbeit haben werden,
so dass wir alle von der erhöhten Flexibilität der TRLE-Engine profitieren und dem TRLE auch
nach einer Jubiläumsedition von TR neues Leben einhauchen können.
Aber welche Optionen auch immer durch TREP eingeführt worden sind, ihre Anzahl wächst mit
jeder neuen Version. Wenn man sich die TREP-Konfigurationsdatei anschaut, sieht man
Hunderte von Einstellungen, die der tomb4.exe eingeschrieben worden sind, und es gibt
auch eine Menge von benutzerdefinierten Binärdaten für diverse Code-Patches. Das alles
ist schwierig zu handhaben, insbesondere weil man sich bei der Modifikation von .exe-Dateien
keinerlei Fehler erlauben darf – ein einziges falsches Byte kann alles
vermasseln oder sogar den PC zum Absturz bringen. Ich lebe in beständiger Sorge
davor, dass ich diesen oder jenen Parameter fehlerhaft modifiziere und dann jemand kommt und
sagt: "Nö, also echt, dieses Programm ist dermaßen voll von Bugs, dass ich auf keinen Fall
versuchen werde, meine Exe zu verändern, nicht in diesem Leben – da verlass ich mich
lieber auf die gute alte TR4-Engine von 1999."
Nur – dummerweise ist diese TR4-Engine nicht gut. Sie ist veraltet, hässlich und steif.
Und zudem (ich hab's oft genug gesagt) hat Core Design die Levelbauer ziemlich alleingelassen.
[...] Selbstverständlich hat Core hervorragende Arbeit geleistet mit den TR-Spielen alter
Schule, aber die Veröffentlichung des TRLE war etwas anderes, als ein weiteres Spiel auf den
Markt zu werfen. Denn wenn eine Firma sich dazu entschließt, einen Level-Editor
frei zugänglich zu machen, dann sollte sie bedenken, dass Levelbauen nicht etwas ist, das sich in
festgesteckte Grenzen schließen ließe: Levelbauen ist eine Kunst, eine Form schöpferischen
Handelns, und es kann nicht durch irgendetwas "hart Codiertes" aufgehalten werden.
Bilde dir also deine eigene Meinung – natürlich kannst du sagen: "Das ist
illegal! Ich bin sehr glücklich mit dem Standardeinstellungen der Engine!" Wenn du
allerdings eines Tages auf ein Problem stößt, das sich mit den altbewährten Mitteln
nicht lösen lässt, dann erinnere dich daran, dass es keinen anderen Weg zur Behebung
dieses Problems gibt als eben die Veränderung der Exe.
2.0 WORUM GEHT'S HIER EIGENTLICH?
In diesem Dokument versuche ich, jede TREP-Option zu erläutern und die Art, wie sie funktioniert. Im Grunde ist alles sehr einfach – man ersetzt irgendeine vorhandene Konstante und verändert teilweise den Code. Ich habe dies bereits im Readme zu erklären versucht [das einstweilen nur auf Englisch verfügbar ist], aber jetzt, da die Zahl der Optionen in die Hunderte geht, scheint wohl eine etwas detailliertere Erläuterung angebracht zu sein. Das kann von Nutzen sein für den, der wissen will, wie die TR4-Engine bestimmte Vorgänge zustandebringt, wie sie mit diversen Konstanten arbeitet usw. Oder kurz: Wenn du nicht weißt, was du mit TREP anfangen sollst – lies diesen Text!
Dumme Frage: Warum heißt das Teil "Tomb Raider 4.5 Engine Patcher"?
"4.5" bedeutet nichts weiter als dies: Es handelt sich nach wie vor um die alte TR4-Engine. Keine bedeutenden Verbesserungen der Grafik, keine neuen Bewegungen oder Befehlstasten, keine neuen animierten oder sonstigen Objekte, keine neuen Effekte oder Slots für Feinde. 'tschuldigung. Aber! Es ist bereits nicht mehr exakt diegleiche TR4-Engine wie die von 1999. Sie ist jetzt flexibler, bestimmte Funktionen können umgangen, einige modifiziert werden. Ich glaube, dass ein begabter Levelbauer bei vernünftigem Umgang mit den TREP-Optionen neue, erfrischende TR-Spiele hervorbringen kann, die sich vom Herkömmlichen in Gehalt und Gestalt...nun ja...zumindest ein wenig unterscheiden.
Du kannst ruhig mit den verschiedenen Optionen herumexperimentieren und versuchen, sie auf andere Weise zu nutzen als vorgesehen – schließlich bist du nicht beschränkt auf eine Handvoll vorgeschriebener Änderungen! Bei TREP kann jeder selbst entscheiden, welche Funktion aktiviert werden und welche unangetastet bleiben soll. Das übergeordnete Ziel von TREP ist in jedem Fall: den Levelbauern ein Maximum an Benutzerdefinierbarkeit zu gewährleisten bei einem Minimum an Eingriffen in die Programmstruktur.
Wenn du bisher noch nie eine Exe modifiziert
hast, solltest du dir folgende Regeln einprägen. Zunächst: Ich hoffe zwar, dass alles
glattgeht und dein Spiel niemals ohne angebbare Gründe abstürzen wird, aber dennoch solltest du immer eine Sicherungskopie
der originalen Exe anlegen. Falls etwas schiefgeht, falls TREP deine
tomb4.exe in fehlerhafter Weise modifiziert, dann lösche die kaputte Exe und
stelle die alte aus der Sicherungskopie wieder her.
Zweitens: Einstellungen immer als Voreinstellung (preset) abspeichern. Da
die gewählten Parameter nicht direkt aus der Exe abgelesen werden können, müssen benutzerdefinierte
Einstellungen in einer externen Voreinstellungsdatei (trep.tps) gespeichert werden.
Voreinstellungen auf diese Weise abrufen zu können kann auch dann nützlich sein,
wenn man verschiedene Versionen der Engine für verschiedene Levels herstellen will,
ohne jedesmal ganz von vorne anzufangen.
Drittens: Mach dich vertraut mit Hexadezimalzahlen. Jede Windows-Version
verfügt über ein Rechner-Programm, das auch Hexadezimalzahlen unterstützt. Wenn du
also mal an einen Punkt kommst, wo du mit einer Hexadezimalzahl nichts anfangen kannst, dann
geh übers Startmenü in \Programme\Zubehör und benutze den Rechner, um die
Hexadezimal- in eine Dezimalzahl umzurechnen [oder umgekehrt; einfach die Zahl eingeben und links
oben, je nachdem, auf Hex oder Dec klicken]. Hier sind ein paar typische
hexadezimale Zahlen mit ihrren dezimalen Entsprechungen (h heißt hexadezimal,
d heißt dezimal):
FFh = 255d
FFFFh = 65535d
03E8h = 1000d
Und so weiter, und so weiter...
3.1 ANMERKUNG ZUR FARBGEBUNG VON ZAHLEN
In TREP wirst du drei Arten von Zahlen antreffen:
1) Dezimalzahlen mit oder ohne Vorzeichen (positiv oder negativ), z. B. 100, 15, -40, -250
2) Dezimalzahlen ohne Vorzeichen (immer positiv), z. B. 100, 15
3) Hexadezimalzahlen, z. B. FFFF, 07BC, 1C
Diese drei Datentypen werden in TREP mit verschiedenen Farben wiedergegeben:
1) BLAUER TEXT
– positive und negative Dezimalwerte sind erlaubt.
2) BRAUNER TEXT
– nur positive Dezimalwerte sind erlaubt.
3) SCHWARZER TEXT
– hexadezimale Rohwerte.
3.2 ANMERKUNG FÜR LEVELBAUER: WIE MAN SEINEM LEVEL DIE MODIFIZIERTE ENGINE MITGEBEN KANN
Es gibt zwei Wege, um anderen seine
modifizierte Engine zugänglich zu machen. Der erste (und unkomplizierteste): einfach
die modifizierte Exe (oder zwei Versionen davon: eine XP-tauglich, die andere nicht) in
zum Download dazupacken. Der zweite: Dem Download die .tps-Voreinstellungen
(presets) beifügen. Dieser zweite Weg ist für Fortgeschrittene und erfordert VB-Runtimes und ein
gewisses Zusatzwissen über das Patchen von allen, die sich das Level runterladen wollen.
Wer also einfach sein Level veröffentlichen will, sollte einfach die modifizierte Exe dazutun,
wenn man es aber betatesten soll (in welchem Fall du für dein Spiel häufig Änderungen vornehmen
müssen wirst für alle Betatester zugleich), dann könnte es einfacher und schneller sein, stattdessen die
Voreinstellungen zu verschicken. Außerdem können Voreinstellungen auch genutzt werden, wenn
man kein Level, sondern selbstgemachte Objekte/Outfits/was auch immer veröffentlichen will, so
dass Levelbauer wissen, welche Voreinstellungen sie benutzen sollen, wenn sie dieses Objekt/Outfit/etc.
in ihren Leveln verwenden wollen. Beachte auch, dass die .tps nichts weiter ist als eine Nur-Text-Datei
und man also ohne Weiteres unnötige Einstellungen daraus entfernen kann – wenn du
zum Beispiel eine selbstgemachte Waffe veröffentlichen willst, brauchst du nur die diese
Waffe betreffenden Einstellungen beizubehalten und kannst alle anderen Änderungen, die du
vorgenommen hast, entfernen.
3.3 ANMERKUNG ÜBER VOREINSTELLUNGEN FÜR VERSION 0.67 UND SPÄTER
Mit Version 0.67 ist das Format der
Voreinstellungs- und Konfigurationsdateien (.tps bzw. .cfg) etwas verändert worden. Daher
funktionieren ältere TREP-Versionen nicht mit Voreinstellungen, die mit TREP 0.67 oder später
generiert worden sind. Allerdings ist Version 0.67 abwärtskompatibel mit älteren
Voreinstellungen, so dass man problemlos seine alten Voreinstellungen in die neuere
Version übernehmen kann (allerdings empfehle ich, sie trotzdem in die neue Version zu konvertieren).
3.4 "WAAAH, WIESO SIND MANCHE OPTIONEN DEAKTIVIERT?"
Seit Version 0.7 verfügt TREP über einige Funktionen,
die nur in Verbindung mit den Optionen "Extend tomb4.exe size" (Umfang von tomb4.exe erweitern) oder
"Remap scene memory" (Speicher für Szenenwiedergabe neu zuweisen) genutzt werden können. Der Grund dafür
ist, dass der ungenutzte Raum innerhalb der TR4-Engine mittlerweile erschöpft ist, so dass für Funktionen,
die zusätzlichen Code oder Speicher benötigen, eine Erweiterung erforderlich ist. Zu diesem Zweck
modifiziert TREP den PE-Header der tomb4.exe dahingehend, dass ein weiterer Abschnitt mit einer
Standardgröße von 512 KB eingefügt wird. Danach hat tomb4.exe eine Größe von 1,2 MB.
Mehr über die Struktur dieses zusätzlich eingefügten Abschnitts findet sich im Kapitel
Hauptoptionen – Einstellungen für Gameplay.
3.5 SYSTEMANFORDERUNGEN FÜR DIE GEPATCHTE ENGINE
Die meisten der Erweiterungs- und
Neuzuweisungs-Funktionen von TREP erhöhen auch drastisch die Belastung des Speichers.
Wenn zum Vergleich etwa beim Titel-Flyby die alte Engine 18 MB an Speicher braucht,
kann die Belastung des Speichers bei maximal modifizierter Engine bis auf etwa 40 MB
ansteigen. Wer TREP benutzt, sollte also zur Vermeidung von Abstürzen über einen
Arbeitsspeicher von mindestens 64 MB verfügen. Falls dein Level eine große Zahl von
Texturen, Objekten, Animationen und große Tondateien (samples) verwendet,
wird das den Speicher zusätzlich belasten. Besser wäre es daher, einen Arbeitsspeicher
von mindestens 96 MB zur Verfügung zu haben, um auf der sicheren Seite zu sein.
Auch sollte man bedenken, dass die TR4-Engine seinerzeit optimiert worden ist für
die Darstellung wenig detaillierter Szenen und bei hochdetaillierten eine recht
armselige Vorstellung gibt. Die TR4-Engine ist in erster Linie von der Geschwindigkeit
des Arbeitsspeichers und der Leistung der CPU abhängig, daher empfehlen sich ein
sehr schneller DDR-Speicher und CPUs mit hoher FSB-Geschwindigkeit. Viele der
neueren Levels (etwa Neon God) sind fast unspielbar auf Computern mit
niedrigem SDRAM-Speicher. Überraschenderweise spielt aber die Leistung von
Grafikkarte und GPU hier überhaupt keine Rolle; für einen flüssigen Ablauf des
Spiels ist eine Karte vom unteren Ende der Leistungsskala (wie GeForce2 MX,
GeForce FX 5200 und dergleichen) völlig ausreichend.
4.0.: GETTING STARTED…
What you should do exactly after you've downloaded .zip file with new TREP version? Unpack it, and most likely you will see two files — executable itself (trep_xxx.exe), custom patches file (patches.drc) and folder with help files (readme.txt and such). If you will try to launch executable at the first time, you will receive this warning:
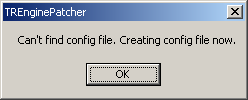
This warning is COMPLETELY NORMAL. If you are launching TREP first time and seeing this warning, it only means that TREP now will create new configuration file (trep.cfg) in the same directory. Also, this message will appear if some error will occur during configuration file reading. Meaning, if you will try to edit config file manually and modify some parameters incorrectly, most likely this message will appear.
This message will appear if
syntax.fln
command
file (required for Flipeffect and Racetimer editors) was not found (or if you launching
TREP for the first time):

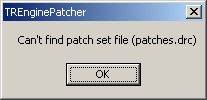
This message appears if you haven't put patches.drc (DRACO custom patch set) file in the same directory with TREP:
If you have copied new executable in the directory where old TREP version was, you will get this warning:
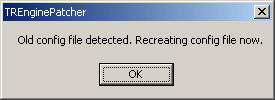
It will appear only if you have
forgot to delete old version's config file.
But what if you'll see this message box then?
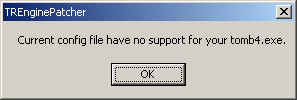
It means that you're using tomb4.exe engine,
which is not compatible with TREP. For now, TREP only supports EUROPEAN TRLE
GAME ENGINE VERSION — BOTH XP PATCHED AND NON-XP-PATCHED.
But… what if you see THIS warning?
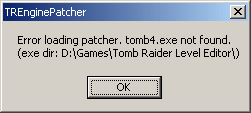
It means that you are trying to
launch TREP from directory which is not contain tomb4.exe file. Put TREP executable
in the same directory as tomb4.exe, or move tomb4.exe file to TREP's directory.
And you'll surely see these standard Windows alert boxes, if you'll try to modify already launched executable:
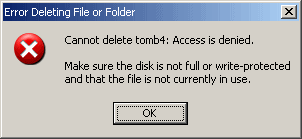
***
Now for more advanced error messages. This message will appear in two cases. First — if config file was incorrectly modified or old config version was used. Second — you have entered incorrect parameter in Flipeffect or Race Timer editors, or you have incorrect custom patch specified in custom patches section. The reason why this message appears is internal binary converter cannot convert some string data into byte array:

And now, the most nasty error in whole executable:

Normally, there must be no reason for this error message, but who knows… TREP is really bugged program!
5.0.: TREP MAIN WINDOW
After brief appearance of loading screen, you will see main TREP window.

Main window divided in three parts — video / audio settings, gameplay options and functional buttons & version label.
Functional buttons are: «about…»
(brings up fancy greetz screen), «load preset»
(loads predefined
settings file), «save preset» (saves it), «defaults»
(resets
ALL settings to config file's defaults), «modify» (modifies executable)
and «quit» (no need for explanation, though). Also there is
small gray button in the bottom left corner named [out] . When you press it, TREP will generate
listing of all used offsets and bring you message box with information about
current configuration file. It is useful if you want to know if your config
file correct or not — if there is any empty offsets, it means that your config
isn't valid and you should fix it or delete it. Also it allows you to see full
TREP offset map.
Useful trick: maybe
you're wondering how to reset to defaults main window settings, but leave intact
all other settings. Here's the answer: click TREP logo in upper right
corner, and main window settings will reset to defaults.
CONSOLE MODE
TREP
supports console input. To activate console, like in any first-person shooters,
press ~
key in the main TREP window. Then small console textbox will appear.
In console,
you can enter ANY TREP parameters listed in config/preset file. For example,
type DrawingDistanceRange=10000 and you will see that drawing
distance value changed to 10000.
Console is useful if you want to change
some options without wandering in TREP's dialogs and forms.
Also there are some shortcut commands:
MOD or MODIFY
: modify executable.
RESET or DEFAULT : reset
ALL settings to defaults.
KILL or QUIT or EXIT
: exit TREP.
5.1.: MAIN WINDOW — GRAPHIC SETTINGS
Most important options in «graphic settings» is surely Drawing Distance (DD) options. By default, TR4 engine renders about 20 sectors in front of you, then it just cut off polygons and you can see only skybox or darkness. Now you can freely change this limit, and make it lower or higher. Lower DD values can be useful when creating foggy levels (mean «Silent Hill») or just for saving system resources, when higher DD values can be useful with large open-air spaces.
WARNING! If you are using high drawing distances, also YOU MUST USE «Remap scene memory» option, or else TR4 engine WILL crash in most cases! Why it happens and why you should remap TR4 scene memory for using high drawing distances? Well, this problem caused by overloading of two internal TR4 dynamic arrays with polygon, texture, etc. data (in other words — scene data). So, to use high drawing distances without risk of overloading these arrays, they must be reallocated (remapped) to extended (larger) memory zone. But even when this limit is increased, there is still a chance to catch a crash, if your scene will contain more than 20000 fully textured faces, especially with environment mapping (aka shiny effect).
As for Distant Fog, this parameter is responsible for distance where fog begins to fade-out everything to black (or color which you've set in script file). Look at this picture and you should understand what we're talking about:

Let's imagine that Lara standing
at left and watching to the right. All rooms and objects BEFORE DF range
(i. e. colored with blue) will be 100% visible. Then, after DF range reached,
all objects and rooms will begin to fade to black or scripted FOG colour (colored
with red at our picture). Then, after DD range reached, every object or room
will just disappear and you will see only skybox or blackness!
So now you
can freely change these two parameters. For example, you can move distant fog
farther, like this:

…Or you can increase/decrease both Drawing Distange range and Distant Fog range.
Here is an example how good old levels look like with extended drawing distance:
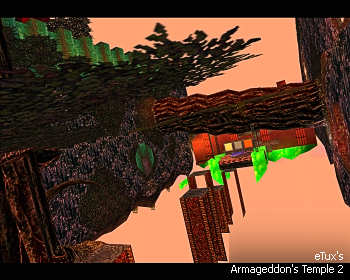
In this example from eTux's level, we can see whole area without orange fog. You can see the building in the far side of The Source, all platforms and walls. It looks even better in-game!
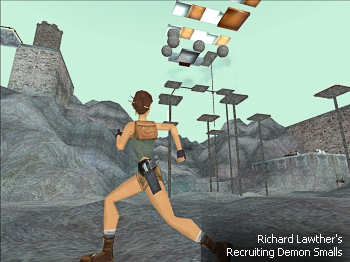
This is screenshot from beginning
of «Recruiting Demon Smalls». If you'll try to play this level with
maximum drawing distance, you will be able to see whole area with mountains
and huge building. It looks absolutely awesome in dynamic.
Both Drawing Distance and Distant Fog values are IEEE-754 32-bit float values and they can be fine-tuned to any value you want. Also, there are five preset buttons (entitled «DD presets») for drawing distance values: hell, default, not too far, far and very far. In most cases, «very far» preset should work OK with «Fix drawing distance crashes» option set to on. But you must note that setting DD/DF values extremely high is not good in terms of speed optimization.
HARD CLIPPING OPTIONS
Hard
clipping is a clipping that occurs in indoor rooms (without sky). Maybe you
already have seen these awful disappearing rooms/objects even with increased
drawing distances (for example, see GokuZ's Toy Story Demo). Now
you can make this clipping more flexible or turn it off completely. Here is
overview of all settings:
Hard clipping range: all
simple — range, at which objects and/or rooms will disappear. By default it's
equal to drawing distance range, but you can change them independently. But
note that you can't set it more than about 131000 units. Why? Well, because
even if this value equal to drawing distance range, it acts somehow different.
It's very possible that this hard clipping is a very old code, maybe even back
from 1996 year, because it affects only indoor rooms, and TR1 contained no outdoor
rooms at all.
Affect — default (indoor) / all objects / off: even
more simple than previous option. Default changes nothing, but all objects
option will turn on hard clipping for ALL objects in level — even for those
in outdoor rooms. What's the use of this? Well, look at big outdoor games like
Serious Sam: Second Encounter. When there is a huge outdoor area around you,
you simply CAN'T fill it all up with objects, because system resources are not
unlimited. So, good idea is to set all objects disappear after some distance,
when player can't see them. But all «geographical» surfaces (i. e.
rooms — walls, floor, ceiling) will stay in scene at any range. Even
more good idea is to set floor texture colour to a colour similar to objects
you've placed on it — so transition will be almost invisible. For example, you
can create outdoor area about 80x80 squares and then fill all the floor with
tall grass objects, trees, etc. Of course, engine will crash then, or will act
slow as hell, because this is too much! But if you'll use texture with the same
colour as grass and set Hard Clipping distance to about 1/3 of overall drawing
distance and turn it on for all objects, game will run faster and won't crash.
Here are two examples how hard clipping option works with rooms.
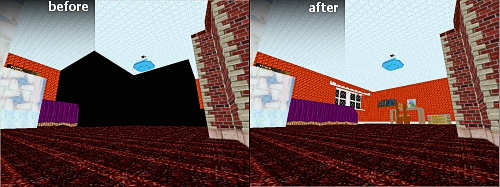
1. This is the pictures from GokuZ's
Toy Story demo. As you can see, when hard clipping option set to intact, far
rooms are «clipped» and completely not visible, and appears as empty
black cubes.
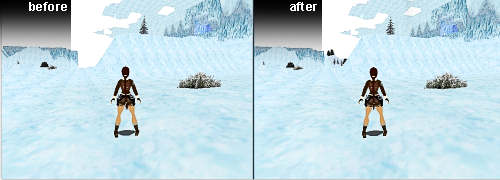
2. This is from SeiferZero's Twin Crystals 2. It's easy to see that far zone of this large scenery is vanished, when hard clipping is intact. When hard clipping is off, you can see ALL scenery without clipping.
If you've decided to play some level without hard clipping at all, remember to use «Remap scene memory» option, because disabling hard clipping also affects scene memory usage.
FOG BULB CUTOFF: This option similar to Hard Clipping option, but it affects only volumetric fog bulbs. You also can set it to free distance in sectors (just press edit… button, and Fog Tuner will pop-up), or disable completely.
***
Another options that you can change in main window's «graphic settings» are:
Turn off distance limit completely:
this option modifies TR4 code a bit, so polygon cut-off procedure will be
bypassed (sorry for lame definition).
Force
volumetric FX = OFF: this option useful when you want user to play your
level with colored distance fog without turning off vol. FX via game setup.
Remove
look transparency: not so useful option. It turns off «transparent
Lara» when pressing «Look», like it was in TR1-TR3 games.
Disable enemy disappearance: turns off enemy
disappear, for both land and water enemies. Again, like in TR1-TR3 games.
5.2.: INCREASE ENEMY / OBJECT LIMITS AND RELOCATE TARGET BUFFER OPTIONS
Please note that «Increase enemy / object limits» option is a COMBINED OPTION to increase THREE different limits:
1) Overall TR4
engine data buffer (from 5 MB to 20 MB).
2) Amount of items in level.
3)
Amount of simultaneously shown enemies.
For detailed description of each option, read further.
INCREASE ENEMY LIMIT: Since TR1, enemy limit in TR games
was 5. No more, no less. Only known exclusion is Compsognatus dinosaurs from
TR3 and Little Beetle/Rats in TR4/5. This is so damn sad… When games like
Serious Sam storming you with hundreds of enemies, poor TR games can offer you
nothing but 5 baddies or dogs or scorpions or anyone else. Fortunately, enemy
limit can be increased from 5 to 20, so you can create more action-packed
games. Imagine 10 dogs attacking Lara from all sides, 5 eagles attacking from
the sky and 5 snipers firing from
guard towers…
P.S.: Actually TR4 engine can handle about 30 enemies in
scene, and maybe even more, but sad part is auto-targeting bug: maximum
stable amount of enemies, when auto-targeting still works correct, is 8. The
reason is small target buffer, which allows to store data only for 8
targets. So, if you'll just set «Increase enemy limit» option to ON
without any additional options turned on, enemy limit will increase only to
8 enemies.
But don't worry, you can get even
more enemies at the same time. How? Relocate target buffer option will
help you. What this option does? It relocates target buffer to another memory
zone, so engine can handle up to 20 enemies in scene. But note that you'll
be able to turn this option on ONLY if you've selected «Remap scene memory»
option. That's because relocated target buffer
is placed in a memory zone which was occupied by old (non-remapped) scene buffer.
As long as you remap scene memory to a new location with «Remap scene memory»
checkbox, this old memory zone is free,
and target buffer can be moved there.
USEFUL NOTE: If you think that 20 enemies still isn't enough for you, you can increase it even more. To do this, open config file and find these lines:
|
IncreasedEnemyLimit=
14 |
These two lines define amount of overall enemies and overall memory buffer for enemies. Both values are hex values (so 14 means 20), and EnemyLimitZoneModData is an inverted hex value (i. e. actually it's 0001BD78). To increase enemy limit even more, set desired hex value for IncreasedEnemyLimit (let's suppose you want 50 simultaneous enemies — then you must set IncreasedEnemyLimit to 32). Next, use this formula to calculate memory buffer for enemies
EnemyLimitZoneModData = Hex(1646 * IncreasedEnemyLimit)
I. e., if you want 50 enemies, you must use this value: 1646h * 32h = 459ACh. Then invert it in this way:
000459AC → AC590400
And this will be desired EnemyLimitZoneModData value.
INCREASE NASTY 256 OBJECT LIMIT:
Everyone knows about that. 256 objects… What's the point of this limitation?
Who knows… Anyway, now you can disable it too. How? Same way as enemy limit
— just activate checkbox. Next, try to add more items to existing projects and
see what's the difference between non-modified and modified versions. In most
cases, if you'll try to load a level with, for example, 310 objects, it will
crash or hide some items from you.
Good example how this option affects gameplay,
is JMN's «The Nightmare» level. This level contains 256 items, and
if you will try to light flare and throw it, it will immediately disappear (it
happens because flares/ammo/torches count as ordinary items in TR4 engine).
Now the most interesting question: how many objects now
you can use in your level? And here is the answer. By default, TR4 reserves
1439232 bytes of memory for 256 objects. TREP increases this limit to 5756928
bytes and 1024 objects. As reported by TRWad, maximum amount of objects that
can be activated is 1023, so we can presume that 1024 is more than enough.
Be
very careful when increasing object limit. It's not known how 512 or 800 or
1000 objects will be kept by engine in savegames, so test it a lot before releasing
your custom level. It is obvious that you will need to use ResetHUB script command
more frequently to clear object cache.
INCREASE OVERALL
TR4 DATA BUFFER: TR4 engine uses single data buffer (heap) to allocate memory
for various types of
data — mesh data, TexInfos, boxes, rooms, and so on… This heap is very small
by default — only 5 megabytes! This checkbox will also increase this buffer
up to 20 megabytes, so you theoretically can use much more TexInfos and build
more complicated levels that could have crashed engine before patch.
Also
this modification can remove so-called stretching polygon bug,
when you see garbage polygon pointing to upper left corner of the screen (to
read more about this bug, go to this tombraiderforums
thread).
If your level
gone beyond this increased 20 megabytes buffer size, you can increase it more.
To do this, find these lines in config file:
|
LevelBuffer1ModData= 01312D00 |
Both these values
are hex values. First entry (LevelBuffer1ModData) specifies buffer size in bytes,
and second specifies buffer size in dwords (i. e. quad-bytes). Simply put, second
value should be 4 times smaller than first.
For example, if you want to change
heap size from 20 megabytes to 40 megabytes, you should modify these lines like
this:
|
LevelBuffer1ModData= 02625A00 |
But don't try to use
extremely large buffer size values! Remember that engine will immediately
reserve ALL this memory after launching, so if you have 128 megabytes of RAM
and set buffer size to 256 megabytes, it won't end up good for you.
5.3.: INCREASE PER-MESH VERTEX LIMIT
Limits, limits, limits… Just another
boring limit — 255 vertices per one mesh. Accidentally, this setting was found,
and now you can increase limit. But… there is one thing you should remember.
DO NOT use meshes with: 256, 512, 768, 1024, 1280 etc. vertices, because TR4 engine's
internals won't work correctly with these values. All other values (for example,
257, 511, 1023, 1025 etc.) should work fine. Maximum amount of vertices in every object
is not tested, I can only say that meshes with 4500 vertices works fine, and
this is not the limit. Supposedly, max. vertices per mesh is now 32767 or 65535.
So, per-mesh vertex limit now increased in about 128 times. I've read
somewhere that «you can't create whole room as an object». Well, now
you can.
Stupid question: why some vertex values can send engine to crash? The reason is strange TR4 engine mesh loading procedure,
which uses some vertice numbers for strange purpose (more precisely — it occupies
upper byte in WORD vertices number value). For example, even if you
didn't use any high-detailed meshes, sometimes hexadecimal numbers 0100
(decimal 256), 0200 (decimal 512) etc. will appear there. Thus, it's needed
to bypass ALL rounded (hex 0100, 0200, 0300…) vertice amounts. That's the
reason why you shouldn't use meshes with 256, 512, 768 etc. vertices.
5.4.: INCREASE FLYBY SEQUENCE LIMIT
Core design really brought cinematographic feel to TR games since TR4 with implementing flyby cameras. Sadly, this feature was limited in TRLE too — maximum amount of flyby sequences per level is only 8! But with this option you can increase flyby sequences up to 64. Note that you still can't add more than 8 flyby sequences with TRLE editor. However, latest revision H of dxtre3d 2.0 allows you to create up to 64 flyby sequences and up to 128 flyby cameras.
Stupid question: why you can't set this option to ON by default? Answer — as with relocate target buffer, this option also requries to remap scene memory with corresponding checkbox. That's because TR4 engine uses two 8-bytes long fixed memory zones to keep information about flyby camera numbers. When you remap scene memory and increase flyby seq. limit, these two zones are relocated to old scene memory zone (which is not used anymore with scene remap), and each flyby sequence zone occupies 64 bytes.
When you're enabling this option, amount of maximum static mesh slots will be increased from 60 to 240. This way you can create levels with far more details, furniture, different types of trees, etc. etc.! It is not known how TRLE will handle extended static mesh slots (above 60), but dxtre3d can handle it pretty well.
5.6.: REMAP
PARTICLE BUFFER
This option requires
«Extend tomb4.exe
size» feature enabled.
In the year 2005, Ageia released special
hardware unit PhysX, which can drastically boost performance in complex scenes
with thousands of particles. In the year 2006, Crytek announced their new DirectX
10 game named «Crysis». In the year 2006, Tomb Raider 4 engine (written
by Our Dearest Core Design Programmers) still was able to draw only… are you
ready?.. 256 particles.
What does it mean? Well, if you will decide to put
a lot of flames, steam/smoke/mist emitters and sprinkler/darts objects
in your map, very soon you will realize that a lot of particles just missing
— no ricochets or sparkles, no flame or smoke sprites in some places where
they are supposed to be. This happens because of this 256 particles limit.
Remap
particle buffer option can increase particle limit by moving particle
buffer to other memory zone. Here is the example — three fountains (emulated
with Sprinkler objects) before and after particle limit increase:
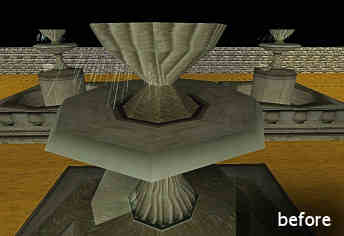
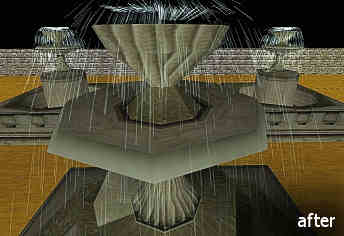
Of course, Our Dearest Core
Design Programmers are keeping their brand name's reputation here too —
TR4 has a particle bug, when some of particle's coordinates may be corrupted.
In game you will see it as chaotically flying lines or sprites (usually you
can observe it with a lot of flame emitters placed in level — you will sometimes
see flickering flame sprites)
6.0.: VIDEO / AUDIO SETTINGS' SUB-SECTIONS
In the right part of «video / audio settings» main window section, 7 buttons are placed. When you press one of these buttons, audio or video settings sub-section window will appear. Now let's try to explain what each sub-section does.
TR4 engine contains only 6 bars — health, air, sprint, loading, sound and music bars. In exe file, each bar has its own procedure, where colour, width/height values are set.
All TR4 bars has two colours to be set — main colour (which appears at the «center» of the bar — red for HP bar, blue for air bar, etc.) and fade colour (which appears at the top and bottom of bars). You can independently change all these colours.
NOTE ABOUT POISONED COLOUR: Actually, poisoned colour isn't an independent value — it blends with HP bar «main colour». I. e., if your HP bar's main colour is RGB(FF,00,00) and «poisoned» colour is RGB(00,FF,00), then actual poisoned bar colour in game will be:
RGB(FF,00,00) + RGB(00,FF,00) = RGB(FF,FF,00)
But what happens if, for example, your HP main bar colour will be RGB(30,00,FF) and «poisoned» colour will be RGB(FF,60,00)? Look, maximum value for each colour is FF (decimal 255), and 30+FF=12F. If something like this will happen, then corresponding POISONED colour will be ignored, and «main colour» will be used. I. e., in our case, poisoned bar colour will be RGB(30,00,FF)+RGB(FF,60,00)=RGB(30,60,FF). It can be clearly seen in these small preview colour rectangles.
Next, what the hell is «animated» feature? Everyone of you have seen animated bars in «Options» menu — sound and music. As for other ingame bars — they are static by default. But with little code modification, it's possible to make them animated too. Note that animated bars' colour formula is different. To be more precise, animated bar uses sky sprite to overlay animating effect (thanks to GeckoKid for information about this!).
Also, you can disable any in-game bar. For example, you can turn off loading bar (like in PC version of TR3) or disable health bar (if you don't want player to see current HP, like in old Resident Evil games).
Width, height and X values: width
and height values can be adjusted for each in-game bar. As for X position, it
can only be adjusted for sprint, air and loading bar.
NOTE: Loading
bar position can't be set more than 7F. This happens because loading bar's horizontal
position coded as 1-byte value, and values more than 7F will actually give you
negative position value.
ABO and PBO colours for Music/Sound volume bars. ABO means «Active Bar Overlay», and PBO means «Passive Bar Overlay». These two parameters responsible for active (highlighted) and passive (non-highlighted) additional colours of these two bars. Active Bar Overlay colour can be independently set for each bar, when PBO can be set only for both bars at the same time.
Border: sets colour for ALL bar borders.
Critical bar blinking speed: speed of air and HP bar blinking, when they're in critical state. You can set it to 0 and get fancy hi-tech flickering bars.
Static bars style: defines
style of static bars. You can choose three options:
Normal
— standard TR4 bars (horizontally-faded).
Gradient (TR5-like)
— gradient bars like in TR5 (faded with black colour from top and bottom)
Gradient (flat) — flat gradient
bars.
Examples of how flat and TR5-like gradient bars look in game:

Primarily, Font Customizer allows you to change fonts' colours. Of course, you can always color font sprites itself and then re-insert it into level file, but you'll never get a chance to modify each ingame colour in that way. But with Font Customizer you can independently change colours of every font.
NOTE: Actual in-game colours will
look different than in TREP, so make sure you've tested selected colours and
got proper result.
TEXT EFFECTS: please don't think that you can
change only effects and align in main title screen. Almost all text is customizable
in TR4 engine, but I'm too lazy to implement ALL possible text entries for now.
LEGEND DISPLAYING TIME: there you can change legend (this short «The year 2000, somewhere in Egypt…» text) title timeout, but you can't set it more than FF.
WINDOW TITLE: changes options and game window title from «Tomb Raider - The Last Revelation» to anything you want.
6.3.: Credits Sub-Customizer & Credits text editor
Warning: many people complained about incorrectly working credits. As stated by Tombcool, credits are not visible and begin to flicker if you're trying to bring some other Windows application over TR4 window. Supposedly, the case of this bug is engine incompatibility with newest graphic cards (for ex., late ATi Radeon cards).
Let's imagine you have created your first (or second, or last) custom level. You've put a lot of work into it, maybe spent years manually texturing models, fixing numerous bugs and creating new traps. And of course you now want to give a credit to all who helped you, to list music you have used, etc. etc. But no matter what you'll do, TR4 has eternal hardcoded credits with Richard Flower & Co.! Well… It was true until now. Firstly, GokuZ released his article about modifying executable to create custom credits. But I think it's too difficult to edit PLAIN TEXT with HEX EDITOR, so that's the reason why Credits text editor was created. This small text editor delivers some useful functions for easy credits modifying. Let's have a look at it:
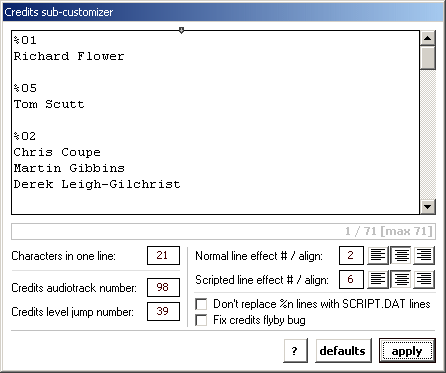
Credits sub-customizer consists
of main text field with credits text, status bar (gray rectangle
with «1 / 71 [max
71]» text in it) and some extra options.
Status
bar provides you information about current credits text and will also warn
you if any errors will occur. But in its normal state, status bar provides you
this information:
Current line / Overall lines in text [max amount of lines allowed]
I. e. if you read in status bar 7 / 24 [max 52], it means that you now editing line 7 of overall 24 lines already in text, and maximum amount of lines is 52. Maximum amount of lines depend on specified characters in one line value (to know more about this value, read further).
Also note horizontal pointer at the top of the text field. Its function — to specify how many characters can be used in each credit line (optionally, you can change this parameter with characters in one line textbox).
If you're going to use custom credits, you should know about relation between line length and overall number of lines. The case is TR4 engine uses fixed amount of memory to keep credits lines, and for each line it allocates fixed amount of memory. In other words, you are limited to about 1500 bytes of text. However, as mentioned above, you can freely change line length. But the more line length is, the less is overall amount of strings you can use.
If you will exceed maximum amount of strings, line label in the right side of status bar will become red and will notice you about this. Also, if you will exceed maximum line length, orange message will appear in the left side of status bar, noticing you about first problem string. If you will ignore these warning messages, redundant strings and characters simply won't be written into executable!!!
Other interesting thing in TR4 credits string format is strings with a look of %0n. What does it mean? In simple words, such string forces engine to load specific text from SCRIPT.DAT file and also apply other style and formatting to this line. By default, these «scripted lines» used for department titles, like Programmers, Sound FX, Music and so on. It will be easier to understand if you'll just look at this screenshot:
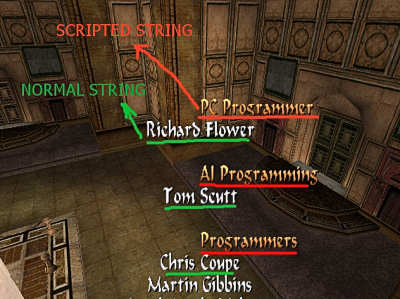
«Normal string» will appear as is in game. But if you will print out, for example, %01, then corresponding «scripted string» will be used instead (in your case it's PC Programmer). Check out SCRIPT.TXT file to figure out meaning of each scripted string!
You also can use end credits not only to show names of authors, but also you can turn it into end-game legend, which will finalize your game with words like «…And Lara croft lived happily ever after even after…». There should be enough room for placing relatively large text.
Other Credits sub-customizer options are:
Credits audiotrack number: number
of track used with credits (instead of default title audio).
Credits level
jump number: specifies which number will be identified as «credits
level number». By default it's 39, i. e. if you will place a trigger END_LEVEL
with value of 39, game will jump to credits.
Normal / scripted line effect
/ align: style and align for both normal and scripted lines.
Don't
replace %n lines with SCRIPT.DAT lines: this option will COMPLETELY TURN
OFF scripted strings. I. e., even if you will write %01 or %05 or anything like
this in credits, it won't be replaced with scripted string, but instead
will appear as is.
Fix credits flyby bug: VERY
IMPORTANT OPTION! TR4 engine credits feature is
a bit buggy. When game exits to credits, title flyby won't reset. As a result,
you will see corrupted flyby sequence (for ex., camera will fly off
to the upper corner of your level and stuck there) or completely blacked-out
screen. To fix this bug, use this option.
GFX Customizer 1 changes various graphical FX and particle effects constants. It's not too much options to change, at least for now.
Lightning: here you can modify
lightning parameters. Actually, there are few types of lightning in TR4 engine
(vertical and some horizontal). For present moment, you can only modify parameters
for horizontal lightning (Flame Emitter 3 OCB 2 and 3) and lightning conductor
object.
Blood: and this is
some blood parameters for you. Size, intensity and lifetime parameters are easy
to understand, but as for spread factors, you must note that higher number means
LESS spread. I. e., if you want blood to spread all around the room, set X and/or
Y factors to 3-4. And if you don't want blood to spread, just fall down, set
it higher. Also, most interesting option is set sprite to opaque. Have
you seen original TR4 blood? And you call it BLOOD?! No. This is not a blood.
It's a jam, it's a paint, it's maybe some spiritual substance flying from poor
creatures, but it's not a blood. Since ages, blood in all normal games was opaque
and dark-red, but for some reason Core decided to replace it with unknown acidic
substance. Now you can fix it. For best results, replace existing blood sprite
with some hi-res sprite from other games (because usage of 8x8 monochrome sprite
for blood is a nonsense).
Smoke: here is two option for changing smoke durations
(pistols/uzis and revolver only).
Misc: options for hardcoded waterfall
scroll speed and sky scroll direction. You may need to test those over and over
again to gain necessary results.
«COLOURS» sub-entry
In
this sub-entry you can change some hardcoded colours for some effects:
Gunflash
blend colour: Have you ever wanted to create, for example, blue gunflash?
If so, you maybe encountered problems with wrong gunflash colour: i. e. if you're
creating blue gunflash mesh, it will appear green in game. It happens exactly
because this «Add colour» gunflash parameter. By default, TR4 engine
adds yellow colour to gunflash mesh (RGB(2F,2F,00)). Now you can change this.
Wallpapers
blend colour: this option will modify ADDITIONAL background colour for inventory, options,
load and save screens. It will not make your backgrounds like in TR5, for these
you must use OVERRIDE MAIN COLOUR option.
Override main colour: You now can make backgrounds look like TR5 (not black and white,
but black and yellow), or use your imagination and change colours to something
else. For example, if you are building retro level, you can create sepia background.
Wallpaper fadeouts
— fade top / fade bottom:
these two options will fade top and bottom of the inventory background to
black.
Sparkles blend colour: this is option for so-called «ricochets»
and also sparkles which appear when gunshell falls into water.
Waterdrops colour: this will change waterdrops colour cast.
Shadow
blend colour: you can change not only shadow colours, but also transparency.
By default, all TR shadows look more like a puddles of dirty water, but
now you can make shadows completely black (set «Shadow Transparency»
option to FF). Or you can set it to 00 and remove all shadows completely.
Fadeouts
colour: when TR engine loads new level or loads savegame, screen will smoothly
fade in/out to black. With this feature, default black colour can be changed
to anything else. This is useful when you creating level in Resident Evil or
Silent Hill universe (remember, when you're starting new RE game, screen flashes
with white colour).
Like GFX Customizer 1, this one changes some particle and sprite constants.
Explosion: actually this
sub-entry will modify explosion effect only for crossbow explosive ammo. Maybe
later other options will be included.
Sparkles: a bunch of sparkle
(ricochet) effects. Try to increase «fall-off delay» parameter to
get wonderful slowly-falling sparkles effect. Also you can increase add-on sprite
initial size or change its ID, so it will be seen more clearly.
Sparkles
— unify for various surfaces: In different conditions, TR4 calls same sparkle
procedure with different parameters. One of this different parameters is
sparkle amount. For example, when you shooting at static mesh, armored baddy
or object, only 3 sparkles will appear, and if you shooting at wall — more
will appear. This option allows you to change all sparkle amounts in a row,
so, for example, if you will set sparkle amount to 10 and choose this option,
10 sparkles will appear in any case, not only when you shooting at wall.
Anim
textures — frame change interval: now this is option that can REALLY improve
TR4 engine's animated texture performance. By default, TR4's animated textures
look like slide-show (only 6 FPS), but if you will decrease this value, texture animations
will be operated faster! In combination with large animated texture sequences
(dxtre3d and TRLE can both handle VERY BIG amount of frames and anim sequences)
you can create much more realistic (in other words — SMOOTH) water, lava
and many other effects. It is recommended to use frame change interval 3 or even
2 — it gives very smooth animated textures, for example, water will
look like in Unreal Engine games.
Don't try to use frame change interval
1, because animations will be too fast then, and will look like garbage, but
not smooth.
OVERVIEW:
To make smooth water/lava/etc., you must do three things. First — find HIGH-QUALITY
animated texture sequence for water/lava/etc., because existing TR1/2/3/4/5
animated textures are VERY bad, and it's only 8 frames long. Second — make
LONG (10-30 frames) animated texture sequence with your level editor. Third
— decrease frame change interval to 3 or 2 with TREP. Also, to make water
more realistic and pseudo-«randomized», you can create two different
animated texture sets with different parts of one long animation (for ex., if
you've found 60-frame water animation somewhere, you can divide it to two 30-frame anim
sequences in dxtre3d) and then apply these two different animations on both
sides of your water surface with «double-sided» option enabled.
To
feel the difference between poor old animated texture speed and increased texture
speed, you can, for example, check the water animation in Bojrkraider's
The Experiment 3 or download
this test level (1.4 MB,
two rooms only). By default, water animation look like awful slideshow,
but with increased speed it's now feeling like REAL, FLUID water, not just
8 frames of something called «animated texture». I bet you will never
use ugly default animation speed anymore, if you have seen new smooth water
animation.
Also please note that with increased anim texture speed there
are a lot of other possibilities to create dynamic environments. You not only
can create water, but fire, fog, storms, dynamic landscapes and many more…
Here is other
test level with realistic fire texture
applied to a static mesh with PixStr2. Compare it with old TR4 sprite fire and
think for yourself — what's the best!
The point is right placement for right
textures!
It's almost one year passed since
this option was revealed, but MOST of new TR levels still contain AWFUL, UGLY
and 8-year old animated textures from TR4. But even most important that even
if builder decide to release a level with custom tomb4.exe included, for 99%
he will leave this TREP option intact. I don't understand why TRLE community
still don't see benefits from FAST-ANIMATED textures and still use default,
slideshow-like settings.
Water distortion
/ lighting: specifies speed of waving water effect and lighting. You can
use it to create more smooth and fast water animations.
Thanks to Harly
Wuson for this option.
Flyby widescreen bars — height / speed: these two parameters will modify widescreen cutscene bars. You can increase its size to gain more cinematographic effect (like aspect ratio 2.35:1, Cinemascope and so on).
Fadeouts — speed / duration: this is option for loading fadeouts. You can set duration to zero and increase level loading time by that. Also you can increase both speed and duration to gain more cinematographic fadeouts, but you must test it a lot, because incorrectly modified values can produce funny bugs, like twin or quad fadeout and such. For example, 5/20 values work good.
Underwater dust
— simple — underwater dust values. Maximum amount value will set max. amount
of particles in scene, and density will change speed of UW dust disappearing.
Size and sprite ID values control how large sprites are and which sprite is
used to draw dust. X/Y flow can be used to force dust move to a specific direction.
PLEASE
NOTE that if you will specify other sprite ID, it may look like underwater dust
particles consist only of half desired sprite. It happens because underwater
dust is generated from sprite ID #10 by default, and this sprite also contains
some other picture in the upper left corner, so it must be cutted-off. That's
what engine does with sprite:

Volumetric fog colour table modifier: it looks like Core guys think that it's enough to use palette with only 27 colours as fog. But no. What if you want magenta fog in your level? And it's not here. «Sorry, we are experts in TR and decided that you won't need any other colours» — so that's their point? Sorry, but no more hardcoded fog colour table. Cut off page 97 of your TRLE manual and forget about this nonsense.
Waterfall mist settings: waterfall mist is a hardcoded mist used for waterfall effects, but actually this effect can be used for various purposes. By decreasing amount and increasing density parameters and changing colours, you can create different particle objects. It can be just more dense waterfall mist or completely different effect, like thermonuclear fireball, like this one:
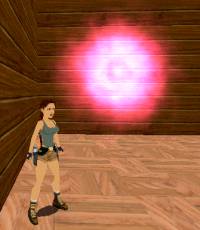
Note that effect looks wonderfully
smooth and vivid in game, especially with large density values, but it eats
a lot of graphical system power, so lots of waterfall mist objects with high
density will cause engine to act very slow. Also, if you will use too much waterfall
mist objects at the same time, they won't work correctly.
Sprinkler settings: used
with Sprinkler object. You can modify spread, amount, arch, colour and also length
(gravity) of particles. Most interesting in Sprinkler object is that you can
create realistic fountains with it! Just enable «Loop forever»
option, and sprinkler will work as long as it's activated!
Note that by increasing
arch value you can create actual fountain physics:
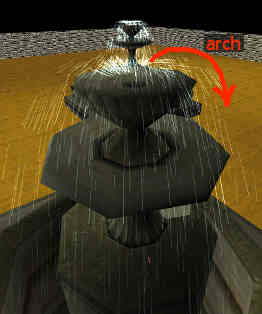
Just remember to use «Remap particle buffer» option in main TREP window, or else your fountains won't work good!
First of all, Light Customizer allows
you to change overall light intensity. This option can be useful if you want
to create more saturated lighting in level. Also you can turn off lights completely
by setting this parameter to zero.
Effective areas: for some dynamic
lights, you can modify effective area. For example, if you creating new guns
with more firepower, you can also increase gunflash effective area.
Binoculars light range: modifies
binocular light range. Binocular range format is completely similar to DD/DF
range format:
05 = DD range 5024.00
10 =
DD range 10240.00
15 = DD range 15360.00
and so on, and so on… Just remember, that you can decrease binocular range to zero and thus turn off binocular light. Also, if you've increased DD/DF range, you can also increase binocular light range in a corresponding manner. (Thanks to Paolone for investigating this parameter!)
Flare colour: looks like a lot of people tired of green flare colour. So I included possibility to change flare colour. Note that you can't smoothly change flare colour, only select from green, red and yellow colour. This happens because TR4 using complicated formula to calculate light colour and a lot of variables must be changed.
Flare lifetime: defines flare's lifetime. You can set it up to 1092 seconds, but please remember that Our Dearest Core Design Programmers left their brand Flare Bug in TR4 engine, so you cannot have more than 32 simultaneous dynamic lights, and flares also count as dynamic light. So, if you want to increase flare lifetime, be sure that player won't be able to activate more than 32 dynamic lights (flares, gunflashes, binocular/motorbike/jeep lights, alarmlight/blinking light/amber lights).
Disable flare blinking effect: when this option selected, flares won't blink, just glow constantly.
Disable motorbike headlight: if you're using motorbike in day levels, you can turn off headlight then.
Blinking light options: some
options for BLINKING_LIGHT light object.
Blinking light — combine with
alarm light option: this option will allow you to use both BLINKING_LIGHT
and ALARM_LIGHT objects in the same slot! Just remember that you must enable
Extend tomb4.exe size option in main TREP window to make it active.
To
turn blinking light into alarm light in game, just set OCB to -100 for desired
BLINKING_LIGHT object. To modify alarmlight radius, you can use Coordinate
options, but note that it will also affect ALL BLINKING_LIGHT objects, so
you must re-adjust their actual nullmesh position, or light will appear
in wrong places.
(Thanks to Harly Wuson for providing information about
this modification!)
Amber light options: same
as above, but for AMBER_LIGHT light object. Note that you can't change
colors smoothly — it's because it is calculated by formula.
Here are a few camera options for you.
Normal camera distance: all
simple — normal (non-weapon) camera distance from Lara's model.
Normal
camera follow speed: this value will set speed for camera following in normal
mode.
Normal camera top: by changing this option, you will «rotate»
normal camera position up and down.
Look/battle camera distance:
by decreasing this value, you will move look camera closer to Lara's model.
Also you can enter negative value here, and then look camera will be placed
in front of Lara model, so you can create first-person look mode then.
Add-on
battle camera top: When you draw weapon, TR4 engine moves camera up to get
a better view of enemy. Well, at least Core guys thought that it will give you
a better view of enemy until TR5. In TR5 they almost removed this add-on height
value, so when you draw weapon, camera position will stay almost intact. By
setting this value lower, you can re-create this TR5 battle camera behaviour.
Change
FOV: here you can change Field Of View for all game cameras except some
flyby cameras and inventory screen. The meaning of this value is similar to
most PC first-person shooters (like Quake 3 and so on). Bigger FOVs will produce
nifty «fish-eye» feeling, and smaller FOVs will create illusion
of «zoomed» picture.
Please use this option carefully, because
in rare cases too high FOV values can cause engine to crash.
FREE CAMERA: Lock — this option allows you to
turn off camera following (when weapons are not drawn). You can freely position
camera with «Look» button and then run off somewhere, so Lara will
be not in camera's field of view. This can be useful when creating screenshots.
NOTE:
when you are starting new game, you should press «Look» button, or
else you will see only darkness. Also, when you will pick something up in game,
you will be not able to see anything for a few seconds. And don't try to use
vehicles with this option active — because you can't use «Look»
button
in these cases!
FREE CAMERA: Stick — minimizes «move away if too near to wall» threshold. If you remember oldest TR games, maybe you also remember that camera behaviour in that games was a little different — when LC is standing close to the wall, camera won't move on side, but will stay beyond LC. This option can be useful in levels with small rooms.
Overall SFX Sample Rate: not
too useful parameter. You can use it to increase
sound quality of samples. Just take your favorite 44100 Hz samples, re-set it
to 22050 Hz (DO NOT resample it, just set lower sample rate) and then increase
overall SFX sample rate. Bad thing is you need to re-set sample rate for
all samples, but it can easily be done with batch converters.
[lara being
hit] sound ID: And now for famous «underwater_door» bug. If you
don't know what is it, here is the explanation. When some enemy shooting to
Lara (Baddy 1, Baddy 2, SAS) and you have somehow modified «sounds.txt»
file, in most cases you will hear strange «underwater»
sound. This
happens because TR4 contains abandoned code responsible for playing sound when
Lara being hit by enemy's bullets. Possibly it should be gibs spreading sound,
or blood splattering sound, or even «Ah-ah, my god, it burns!» voice
like in TR7, but Core never included it in final version.
So,
you have two solutions. First — you can change sound ID, find some «gibs»
or «blood» sample on the Net or rip it from other games (for ex.,
Quake 3 or Max Payne, or earlier TR games), place it in «sound\samples»
directory and
edit «sounds.txt» file, so proper sound will play every time enemy
bullet will hit Lara. Note that sound IDs are completely similar to «sounds.txt»
sound IDs, so if you want to assign sound ID #50, you
must write down 50 into TREP's textbox. Second — you can turn off this sound completely, but I don't recommend you to do so.
[no
ammo] sound ID: same as with [lara being hit] sound ID, but this option
changes sound ID for «no ammo» in-game event. When Lara runs out of
ammo, this sound will begin to play. But Core forgot about it in the process
(remains of this bug can be observed in Cleopatra's Palaces level — when you
run out of shotgun ammo, SARLID_PALACES sound will play).
Enable ricochet sound effect
for Lara's guns: do you remember TR1? If you do, maybe you also remember
that Lara's guns produced ricochet sounds there. For some reason, Core removed
ricochet sounds from TR4 (but you still can hear them when SAS is firing). Here
is an option to bring TR1-like ricochet sounds back. Be sure you have not
overwritten LARA_RICOCHET sound in sounds.txt file!
This option requires
«Extend tomb4.exe size» feature.
Extend sample memory from 256 kb to 1024 kb: most useful option is sound sample memory increaser. What is it? Look, if you will try to use any sound sample larger than 256 kbytes, game will crash. Now this limit increased, and maximum sample size is 1 mbyte. Useful when setting-up long ambient noises, like radio chatter, winds, bird twittering and so on.
Sound customizer: understanding music options
As you can see, now you're able
to extend max. amount of audiotracks from 111 to 127. Unfortunately, TR4 engine
operates correctly only with 127 audiotracks, then various glitches will appear
(due to TR4 engine mostly uses 1-byte signed values for operating with
audiotrack numbers).
Next, you can change
looped audiotracks range. What is it? Maybe you know that some audios are hardcoded
as looped-tracks, and some not. So here you can define track number, after which
(inclusive) all remaining audiotracks will be looped.
Next, hardcoded jeep
and secret soundtracks can be changed or disabled completely. Note that jeep
has not only INSIDE soundtrack, but also OUTSIDE track, which will be activated
when you will exit jeep. Here is description for various jeep audiotrack option combinations:
1) If you will
disable OUTSIDE track, but leave INSIDE intact, «jeep theme» (98 by
default) will play forever until you will step onto other looped track
trigger.
2) If you will disable INSIDE track and leave OUTSIDE intact,
«jeep theme» won't be played, but when you'll exit jeep, corresponding
looped track will be activated (110 by default).
3) If you will disable
BOTH inside and outside tracks, no extra tracks will be played when you'll enter/exit
jeep.
4) If you leave both tracks enabled, TR4 engine will act like
always.
7.0.: MAIN WINDOW — GAMEPLAY OPTIONS
Now we're going to something really
serious. Graphic settings are funny, but more interesting is various gameplay
parameters. All these parameters grouped in «gameplay options» section.
PIGTAIL: FORCE SINGLE/TWIN/INTACT
— This option is useful for creating twin-pigtail haircuts (outfits)
for old Lara and single-pigtail haircuts for young Lara. If you, for example,
set pigtail to «force twin», TR4 engine will be forced to draw
two pigtails in ANY CASE — i.e. for both young and old Lara. Maybe you will
ask: «why should I use this option, if I already can use ResetHUB bug?»
And here is the reasons:
1) Pistols / binoculars / flares will
be shown in inventory screen (unlike ResetHUB bug).
2)
You will be able to use flares.
3) You can use twin pigtals
for old Lara in the very first level too.
4) You can use single
pigtail for young Lara (so you won't have any weapons/flares in your inventory).
FIX HOLSTERS BUG: other annoying
TR4 engine bug is empty holsters when you put back UZI/Revolver weapons. With
this option, bug can be fixed. How it was done? Well, thank goodness there was
enough free space (filled with NOPs) around «put back weapons and swap
holster meshes» procedure, so some jumps were placed for various «active
weapon» conditions.
ENABLE BONUS LEVEL WORKAROUND:
something special for all TR3 and TR2Gold lovers — secret level workaround,
which depends on all possible statistic conditions you may want to set. When enabled, this setting
modifies END_LEVEL trigger behaviour, so if player have corresponding
statistics, he will jump to level specified
in Bonus level # textbox. Otherwise, he will jump to Alternate level
#. Warning! Since
version 0.74 you must specify SECRET LEVEL'S NUMBER as trigger parameter for
corresponding END_LEVEL trigger in your level editor, or bonus level won't load.
When
you press conditions… button, small window with all possible conditions
will pop-up. As you can see, you now may use ALL statistics' screen conditions
as secret level conditions. Here is description for each option:
Time
taken: right, if player will be too slow and won't complete your
game in specified time, bonus level won't load.
Ammo
used: if player will use too much ammo (more than specified), he will
not proceed to bonus level.
Medkits used: just
like in Silent Hill or Resident Evil games — if player have used more medkits than
specified, he won't be able to play bonus level.
Distance
travelled (m): if player will walk around too much and overall travelled
distance will be more than specified — no bonus level.
Secrets:
if player haven't collected specified amount of secrets — no bonus level (this
method was already used in TR2Gold and TR3).
Note that you can create
situations that was absolutely impossible before! For example, like in
Silent Hill or any Capcom games (like RE, Onimusha, Dino Crisis series etc.),
you now can create multiple endings and storyline branches, which will depend
on player's statistics!
DISABLE «HANG GAME THREAD»
ON LOST FOCUS: Debug option. When enabled, tomb4.exe process won't
hang if window has lost focus. Useful when debugging engine with OllyDbg (you
can modify code and immediately see result without switching back to tomb4.exe
window).
EXTEND TOMB4.EXE SIZE: without
this option turned on, you won't be able to use Flipeffect Editor and some other
options (i. e. if you won't turn on this option, these extra options will be
grayed out). This happens because Flipeffect Editor, Racetimer Editor and other
various options which require extra code placement, needs more space to place
such code. Since user-defined flipeffects and racetimer events are not static
and can be very long in terms of hexcode, a lot of space is reserved for these
two TREP editors. Also, for future development, TREP reserves large amount of
memory for its own possibly-forthcoming features.
Here is the full structure
of extended tomb4.exe section:
Extended tomb4.exe section chart
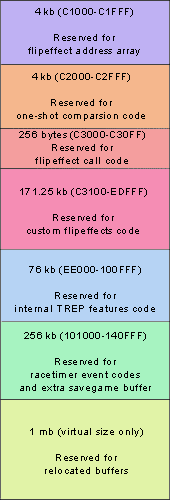
Note: to receive virtual offsets (which can be operated in OllyDbg, CheatEngine and other debugging software), add B52000h in «remap scene memory» mode or 752000h in non-remapped mode.
If you have no custom flipeffects, racetimer events and extra features enabled, most of this space will be filled either with 00 or 90 bytes.
ENABLE ADVANCED SAVEGAME MANAGEMENT: Most of recent custom patches will require this option. It changes the way TR4 engine saves your game — first of all, after this patch you MUST PLACE ALL YOUR SAVEGAMES into /SAVE subdirectory (you must create this directory manually). Second thing — each SAVEGAME.* file will be supported by extra savegame file named TREPSAVE.* to store extra statistics and values used by other TREP patches.
8.0.: GAMEPLAY OPTIONS — SUB-SECTIONS
Like with «video / audio settings», «gameplay options» section contains additional panel with buttons at the right side. Here you can modify gameplay-specific parameters.
It's so stupid to have 2 level editors
(dxtre3d and TRLE), various object editors (pixstr2, strpix3, wadmerger, etc.),
texture editors (TBuilder etc.) but not to have possibility to change enemy HP!
But now at least you can change HP for majority of TR4's enemies. It's really
wonderful that you can set enemy's HP to a VERY big value. You maybe know that,
for example, Scorpion will die after only 50 direct pistol hits. But now
you can create super-bosses with HP set to… are you ready?.. 32767 (hex 7FFF)
!!! I. e., to kill this enemy, you should hit him with: a) 32767 pistol
bullets, b) 2185 revolver bullets, c) 1821 shotgun shells… You got the idea
:) .
ABOUT SMALL SCORPION: The reason why Small Scorpion's
HP placed in independent sub-section is strange TR4 code, which not sets SS's hp to specific value, but uses some
CPU register's value as HP value. To change it, we must modify TR4 code, so
SS's HP won't be equalized to CPU register, but will use its own independent
value. It can be done only by setting far jump to a data section of tomb4.exe
file, because new (modified) code's size is bigger than default code.
But,
of course, you can ask: «if you have moved Small Scorpion's HP code to
other place, then maybe you've overwritten some other data?», and
answer will be: «YES.» . Some data WAS OVERWRITTEN. But supposedly,
this data was useful — it was some kind of greetings message from Richard Flower
— Core's lead TR4 programmer:
|
Tomb Raider IV — The Last Revelation — Dedicated to my fiance Jay for putting up with this game taking over our lifes,my step sons Craig,Jamie & Aiden (Show this to your mates at school, they'll believe you now!!),also for my daughters Sophie and Jody — See you in another hex dump — Richard Flower 11/11/1999 |
I do really hope that Craig, Jamie and Aiden
have made their revenge to their distrustful school mates and now they don't
need this.
ENEMY HP FLAGS: Maybe you're wondering,
what's these colored circles at the right side of each enemy's HP? Here
is the answer — it's hp flags. HP flag defines a reaction for Lara's
gunfire at enemy. For example, Small Scorpion will bleed and die, and Demigod
1 will be invincible. HP flags can change this.
For detail explanation about
HP flags, press [ ? ] button in Enemy HP Customizer.
ABSOLUTELY
IMPORTANT WARNING: if you change your enemies' flags and then try to load a
savegame which was generated with other enemy HP flag values, this savegame
will NOT WORK CORRECTLY or WILL CRASH GAME. It is important when you're testing
your level's playability — don't even try to save somewhere, then edit HP flags
and then load old savegame generated with other HP flags!
Physics Customizer allows you to change majority of rotation factors (thanks to Harly Wuson for discovering most of them), swim speed and some other options.
All these values are RAW values, so you have to test it again and again to gain necessary results. But since version 0.687, your life can be easier, because you can use rounded sliders to define rotation factors. As for Swim Speed, you must set it LOWER to get HIGHER swim speed, and so on. Jump gravity textbox modifies REAL GRAVITY for jumps. In combination with shell casing gravity, it's useful for space and alien levels.
Do not explode motorbike/jeep in water: looks like TR community really tired of hydrophobiac jeep and motorbike, which will explode immediately after they touch the water. Now you can fix this! But you should note that bike/jeep won't stay on the water surface, so you can't make functional boat with it. BUT, indeed, you can now create levels with marshlands, which will need jeep to complete a level (for example, you can set timed door which Lara can't pass on foot through marsh, so she will need to use jeep). Also you can try to create boat and use it with shallow water, but I don't think it worth a try.
Shell casing gravity: this parameter will modify gravity for shell casings ONLY. Higher value will set higher gravity, and zero gravity will send shells fly in the sky. Useful when creating illusion of low-gravity.
Falling damage (divider): if you've decreased gravity, you can also increase (yes, increase, cause it's divider) this value to reduce falling damage from higher ledges.
Disable ledge grab-climb delay:
in earlier TR games (TR 1/2/3), Lara climbs immediately after she grabs
the ledge, but in TR4, there will be a pause between grab and climb actions.
It's very annoying if you like fast gameplay. So turn it off, if you want to
speed-up grab-climb procedure a little.
One of the most serious changes that you can do with TREP is an inventory changes. Years have passed since TRLE released, and no one tried to modify start-up inventory. This is so sad to have same start-up items in the beginning of each custom level… But now it's all in the past!
«Pistols» checkbox:
with this option you can remove pistols from startup inventory. This option can add some realism to your level, if you've removed
guns in the beginning of your level (like it was in Knights of Terafosia, for
example). Also note that pistols will reappear in inventory after picking up
«Pistols» item and will stay with
you forever (even after load/save), but you need to SELECT IT in inventory or
press hotkey (1) to use it (like with any other weapon picked up).
«Binoculars»
checkbox: here
you can remove binoculars from start-up inventory. You think it's useless? Let
me not agree with you. Imagine: now you can create puzzles which will require
binoculars-exclusive features to complete (like dark hole with hint in TR4's
The Lost Library, or never-seen-before Zoom Ratio puzzles).
Crowbar: TR4
engine checks if you've picked up Crowbar in previous level and if so,
it will move it to new level. This checkbox will bypass that code, so Crowbar
will be with you in the beginning of the game and UNTIL THE END. Since this
feature selected, IT CAN'T BE REMOVED WITH SCRIPT COMMANDS.
Amount
of big medkits: it's all simple — change amount of start-up Big Medkits.
Set it to 0, if you want to remove Big Medkits from start-up inventory completely.
Amount
of small medkits / flares: these two textboxes will allow you to change
amount of these start-up items. But notice that if you will try to modify small
medkit value, flare value will change too. Why? See further…
Seperate
Small Medi / Flare amount: do you want to know interesting fact about TR4
engine? Here it is — Small Medkit and Flare start-up amounts equalized in executable.
It is not known why it happened, maybe same reason why Small Scorpion HP equalized
to some register's value. All in all, this checkbox will modify code slightly,
so you will be able to set Flare / Small Medkit amounts independently.
Enable limited
pistol ammo: good god! Now you can get rid of unlimited pistol ammo!
I'll never understand Core Design (and now Crystal Dynamics too), why they set unlimited pistol ammo for Lara…
OK, let's admit that these pistols are gas pistols or water pistols, but what
about shell casings? Unlimited ammo and shell casings — how unrealistic… But
now you can change these things. This checkbox will make pistol ammo limited,
like with any other weapon.
Unfortunately, Pistol Ammo item, which you
surely saw in any TR4 wad, was ignored by TR4 engine. When you are picking up
«Pistol
Ammo» item, engine WILL identify this item as ID #350. But TR4 engine contains
no code to work with this item ID. So, to make this item workable, we need to
add code which will add ammo to inventory, if user picked up «Pistol Ammo»
item.
After
this modification, TR4 engine will use BOTH pistols and pistol ammo items
correctly. Note
that you now can remove pistols from start-up inventory, then pick up ammo,
and it will appear as real ammo, just like shotgun, revolver, etc. ammo.
Start-up pistol
ammo: this option required for limited pistol
ammo feature. Here you will change ACTUAL start-up
pistol ammo value with underlying textbox. By default, engine will set this
value to UNLIMITED («FFFF» in hex), but with little code modification,
you can change it from 0 to 255. Remember: if you have turned on limited pistol
ammo feature,
you WILL NOT BE ABLE TO RESTORE UNLIMITED PISTOL AMMO until starting new game.
All savegames with this option activated will contain limited pistol ammo; you
won't be able to restore it even with GUN cheat.
To create limited
pistol ammo, you should do two things:
1) Turn on «Enable
limited pistol ammo» option
2) Change start-up
pistol ammo to desired value.
Optionally, you
can also remove pistols from inventory. Note that if you will remove pistols
and set start-up pistol ammo more than 0, it will appear as «n x Pistol
Ammo» item in inventory. If you will set start-up pistol ammo to 0, it
will disappear from inventory.
Disable shotgun
ammo 6x divider: as you probably know, shotgun's gunfire consists of 6 shots.
Thus, ACTUAL SHOTGUN AMMO is not the ammo which you can see in Inventory
screen. Inventory screen's ammo is nothing else than ACTUAL ammo divided by
6. So, you now can disable this divider to see ACTUAL ammo amount instead of
divided. This option can be useful when you've reduced amount of shotgun shots
in Weapons Customizer (see further).
Health at startup:
here you can modify start-up HP. But this option will not modify MAXIMUM
health points. To modify Max. HP, you must use HP \ Damage Customizer, which
will be described below.
Air / sprint at startup: same as with HP
startup value.
Disable in-game
load / save: if you want to create demo level without possibility to save
or load, or you want to create level with savegame checkpoints, then turn on these options, and
load/save items will disappear from inventory, and also you won't be able to
use F5/F6 keys.
Disable inventory: same as with load/save.
Disable compass
cheats: if you want engine to ignore compass cheats, you can turn this option
on. Note that compass needle then won't be transparent anymore when pointing
North.
Fix compass direction bug: and one more annoying TR4 bug. Unlike
TR1, TR4's compass shows non-actual compass direction, but Lara's direction.
This is so unrealistic… But this checkbox will fix direction bug, and compass
will show actual compass direction. BUT YOU MUST INVERT COMPASS NEEDLE then,
or else needle will point to south instead of north. If you have standard TR4
compass in your level, you only need to retexture it, but if you have created
custom compass needle, then you must «reverse» it with your 3D modelling
program.
More savegame slots:
once Core released a patch for Tomb Raider 4 which increased savegame slots
from 10 to 15. But sometimes it's still not enough, so here we go again
— savegame slots were once more increased from 15 to 24. It could have been
increased more, but then load/save dialog text strings just won't fit the
screen (it was already compressed at maximum).
NOTE: this option will also
squash text in Control Configuration menu, but since you don't have to go to
Control Configuration frequently, this bug can be considered as minor and non-critical.
Also, this option WILL NOT WORK IN SOFTWARE MODE.
Overall secrets: this textbox allows you to change amount of secrets listed in «Statistics» screen.
FlyCheat magic word: you know that TR4 has FlyCheat that is initiated by pressing DOZY. Here you can change DOZY «magic word». You'd better use words without repeating symbols (e. g. you can use ABCD or BCDA, but better don't use AABB or CCDD). If you will use repeating symbols, it will be treated as one symbol (for ex., AABB will be treated as AB).
Pick-ups quantity:
here you can modify amount of ammo for each pick-up. Note that different
crossbow bolt and grenade types has its own value.
WARNING!!! Pistols / pistol
ammo pick-up quantity will be available ONLY AFTER YOU'VE TURNED ON «Disable
"Unlimited" pistol ammo label» CHECKBOX!!!
Small Medkit effect:
this textbox allows to change small medkit healing effect. Useful when modifying
Lara's Max. HP (see «HP \ Damage Customizer» section) or creating
difficult levels. Also you can set Small Medkit's effect to minimum and rename
it to, for example, «Antidote» — so it will neutralize poison, but
won't heal Lara.
Invert Small Medkit effect: stupid option. Really
stupid. After applying it, small medkits won't be small medkits anymore. They
will DECREASE your HP! Replace «small medkit» mesh with cigarettes
mesh, name it «A pack of cigarettes» — and voila, you have «evil»
pick-up item in your level.
Item/ammo rotate
speed: just for fun. You can independently change item/ammo rotation speeds
in inventory.
Pick-up showing duration: duration of pick-up rotate
animation. You can set it to 0 to disable pick-up showing completely.
What is «Item
configurator»? It's a very small window with very little amount of options.
But these options can completely change difficulty or style of your game, because
it modifies x_combo items behaviour.
Now what is x_combo item?
You surely know what is it. It's all these items entitled Puzzle item 1 combo
1, Key item combo 1, Pickup item combo 1, etc. These items, when combined,
will produce other item. Good to note that TR4 engine actually (of course!)
will NOT combine these items, but simply replace them with some other item.
And surely this newly produced item can be ANY item, not only corresponding
Puzzle/key/pickup item . And most important thing that combo items are
not connected to their parent items, so you can safely use combo
and original items for completely different purposes! For example, «Puzzle
Item 1 Combo 1 + Combo 2» formula can produce ANY item, but you still will
be able to use original Puzzle Item 1 for the same purpose as before.
For example, let's suppose that you started level without any weapons in really «drrrreadful place». There is a guardian somewhere nearby that holds key to the door you should open. To kill this guard and get the key, you must assemble your weapon from two parts — barrel and case. After combining these items, you will be able to use your weapon (of course, you should find ammo too!).
How item configurator works? Plain simple — just two small list boxes. Left listbox specifies current combination formula (e. g. Puzzle Item 5 Combo 1 + Combo 2), and right listbox specifies resulting item of this combination (e. g. Puzzle Item 5). You can assign ANY item to ANY combination, i. e. you can create any weapon/medkit/key/item/pickup with any combination formula.
Example: Puzzle
Item 1 Combo 1 + Combo 2 = Shotgun
This combination will turn two Puzzle
Item 1 combo items into shotgun!
Also Item Configurator is useful for creating multi-layer puzzle items. For example, you can create these two combinations:
Puzzle Item 1 Combo
1+ Combo 2 = Puzzle Item 3 Combo 1
Puzzle Item 2 Combo 1 + Combo
2 = Puzzle Item 3 Combo 2
Thus, player should
find 4 puzzle combos and combine them in the proper way to create only one puzzle
item (Puzzle Item 3).
Look at trsearch.org resource — there are a lot of custom guns available — really cool pistol, UZI, revolver, shotgun, grenadegun and X-bow models… But what a difference it makes, if these items will act like old standard TR4 weapons? So, Weapon Customizer allows you to change ALL guns' damage, and also some specific gun effects.
Complex weapon
modifiers: it's a table which allows you to set 4 parameters for each «holster»
gun and also 3 parameters for shotgun.
a) damage
— you know, it's hard to describe what this parameter does… :)
b)
rate — fire rate. Minimum is 1 (guns will fire like hellstorm). Maximum
is defined by length of corresponding fire animation.
c)
dispersion — bullet dispersion. Useful when creating powerful weapons
with low accuracy.
d) flash dur. — gunflash effect duration.
I like to set it to 1 and set fire rate to 2 — looks outstanding!
Preview screen:
press «Play» triangle button, and you'll see animated preview
of selected gun's effect and rate (some computers will act too slow with this
preview window).
Stupid question:
why only these
weapons are grouped in special parameter table? Well, it resembles actual tomb4.exe
structure.
SHOTGUN GUNFLASH
OPTIONS
Actually, shotgun gun flash uses the same procedure as pistols/uzis/flare
flash, but it will just bypass gunflash mesh draw. It's not good if you
are going to create MP5, M16 or gatling gun in a shotgun slot. MP5 or gatling
gun will look so silly with a lot of smoke coming from it and no any gun flashes…
But if you will turn on gunflash mesh for shotgun, these weapons will
look much more realistic and funny. Also, you can customize gunflash position,
so it will fit your gun animation (by default, position is set for South Pacific
Remake outfit created by PoYu), and customize vertical smoke puff position (you
can hide it under floor, if you'll set it to 255).
Shotgun shot amount:
here you can reduce amount of shotgun shots. In combination with Inventory
Customizer's «Disable shotgun ammo 6x divider» option, this option
is useful for creating other weapons in shotgun slot. For example, you can disable
ammo divider, set shotgun shot amount to 1 and then create MP5/M16 in shotgun
slot.
Explosive weapons damage: damage for any
explosive weapon — both explosive X-bow bolts and any grenade type.
CROSSBOW OPTIONS
Crossbow bolt fly
speed: speed of crossbow bolt.
Crossbow
normal damage: damage for standard crossbow ammo.
Crossbow poison
damage: Enable this option, and you'll be able to change default poison
damage (1) from 0 to 7F.
Crossbow ammo flags: here is the way to change
each crossbow ammo's type. For example, you can set all ammo flags to e, then
create rocket launcher in crossbow slot and enjoy REAL rockets in DEFAULT crossbow
ammo slot.
flametail checkbox: with this little option, you can add extra effect to the crossbow bolts — now they will have flame tail and trailing light! It can be useful, if you want to convert crossbow into some Ultimate Weapon (like plasmagun, flamethrower, BFG etc.):
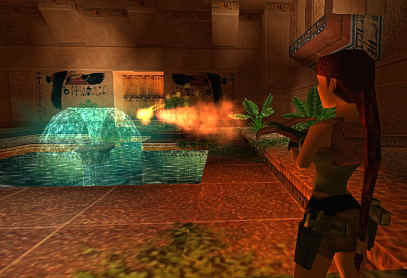
GRENADE GUN OPTIONS
Grenade timer (1/24 sec): timer for Grenade Launcher's
grenades. You can simply increase timeout (up to 65535/24=2730 sec=45 min) or
DISABLE IT COMPLETELY by setting this value to zero. Still, grenades will explode
if any enemy or Lara will touch them.
Grenade weight \ launch power: some
physic values for grenades. With it, you can create «weightless grenade»,
which will fly horizontally (like in TR2). Also, in combination with disable
grenade rotation and force one-touch for all ammo options, you can
emulate Rocket Launcher or TR2 grenades.
Grenade ammo flags:
same as above, but for grenade gun, but with a little difference. Grenade
gun actually has two hidden new ammo types! It's Ultra Ammo (flaming
grenade with cool red tail, which will explode immediately after touching anything)
and Frag Ammo (kind of Super Ammo, but with increased number of fragments).
TARGETING DISTANCE
OPTIONS
We may suppose that Lara Croft is a perfect shooter. She can
fire from 2 pistols, 2 uzis and other powerful weapons from any distance she
wants at anyone she wants. But what if her skills with uzis are less than with
pistols? Here we go. DECREASE or INCREASE targeting distance for ANY weapon,
and Lara will use autotargeting at different distance.
TWIN WEAPON OVERRIDES
These
two buttons specify twin-weapons (i. e. uzis and pistols) configuration. If
you will un-push one of these two buttons, corresponding pistol/uzi WILL NOT
WORK. For example, you can turn off left pistol/uzi and therefore create single
pistol weapon in your game (with editing fire animations, of course).
DISABLE AUTOMATICAL
WEAPON CHANGE
By default, when Lara is running out of ammo, she will
automatically holster her weapon back and take out pistols. Now you can disable
it.
This customizer modifies Lara's maximum HP, various HP bar width parameters and some damage factors.
HP DRAIN section
This
sub-section used for changing various «decrease health» values for
some game events.
a) No air:
when Lara out of air, she drowns. I. e., her HP will decrease until she
will die. Here you can change this decrease factor.
b) On fire:
when Lara catches fire, her HP will decrease. So, this textbox will adjusth
«on fire» HP leak factor.
c) In spikes: when Lara
walking through spikes, she is getting hurt. Here is health decrease factor
for that.
d) In joby spikes: HP drain value for spikes created
by (or for) our dearest level designer named Joby Wood.
e) In smoke: as for
«on fire», but for
smoke…
f) In darts: same as above, but for darts…
USEFUL NOTE: if you want to create underwater level (like «Deepsea Dive») with TR4 engine, then you can set «No air» HP drain factor to 0 and hide air bar (see «Bar Customizer» section). Thus, even if air will drain, HP will not decrease, and you won't see empty air bar (thanks to Barry and Titak from tombraiderforums.com for this hint).
ENEMY DAMAGE/BEHAVIOUR sub-section
Here
you can change almost all enemies' damage.
Little Beetle dispersion: if you'll decrease this value, little beetles will be more «concentrated» when biting Lara, so her health will decrease quickly. But don't set this parameter too low, because then little beetles will go insane and run around Lara with a speed of a sport-car.
Magic attack (divider): Here is divider for ALL magical attack in TR4 game: i. e. for demigod attacks, Set's energy attacks, Mutant fire attack, etc. To increase magic attack damage, DECREASE this parameter.
Disable mutant locust attack: What the heck?! Are Core's designers insane? I mean, WHERE they've seen a dragon with locusts in his mounth? Poor dragon, it's probably tickles him too much… So with this option you can disable locust attack for poor dragon (normal locust enemy still will work).
8.7.: SAS grenades
bugfix
Thank you, Core
Design! Thank you! Thank you very much for this VERY bugged engine,
where holstered weapons disappear, where you hear underwater door sounds when
being shot, where compass pointing to West instead of the East, where flame
sprites are flying all over the level, where game will
crash if you have placed any wrong object in any wrong place. But most
of all, thank you for supplying Lara Croft with her explosion-proof bra (as
mentioned by Magnus). With this awesome bra, no any SAS grenades can hurt Lara!
Oh my god, this is so awe-inspiring!
But enough. We already saw too much
explosion-proof equipment in TR custom levels, so now it's time to cardinally
change it!
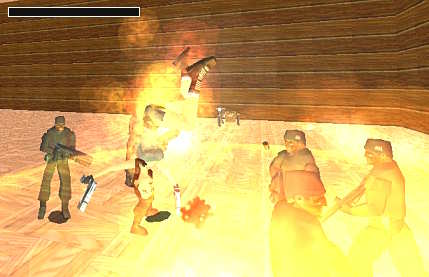
In other words…
SAS grenades bugfix section will allow you to partially fix classic TR4
engine harmless SAS grenade bug. Not only it allows you to turn grenade damage
back on, but also modify some parameters with it:
Dmg / thresh: specifies
damage for each grenade explosion and Lara's HP threshold, after which
grenade will make a «fatality» and kill Lara completely.
Fast
kill: any grenade will kill Lara immediately, like in TR3.
Blow-up
fatality: plays
blow-up animation on death. If you want it to work correctly, you must use Lara
object from revised wad with animation 438 (mine blow-up). Also if you have
motorbike/jeep in your level, don't use it, or else you will see strange things
if Lara will be killed by grenade when driving!
This option requires «Extend
tomb4.exe size» feature.
8.8.:
LIMITS sub-customizer
This
sub-customizer allows you to change maximum health and air bars' values and ranges. It's
useful when you want to create weak or more powerful Lara.
Max. HP bar value:
maximum health value. Used for ingame HP limitation and for HP bar maximum
width recalculation (see further).
Raw HP bar range & Divider: low-level
parameters used for aligning HP bar's width. Do not edit it manually, if you
not sure what you are doing.
Recalculate HP bar range: each time you'll
try to modify max. HP bar value, this button will become red. This means
you SHOULD PRESS THIS BUTTON AFTER YOU'VE SET MAXIMUM HP BAR VALUE!!! Or else
your bar width won't fit actual HP value.
Medkits HP limiter: this
value should be equal to «Max. HP bar value». It is used to «limit»
medkits' effect to an absolute HP maximum.
Normal-critical threshold:
if Lara's health will fall lower than this value, health bar will blink.
OVERVIEW: How
to set maximum Lara's health…
So, to change Lara's maximum health,
you normally should complete these steps:
1) Change «Health
on startup» value in Inventory Customizer to any value you like (but remember
that maximum is 32767).
2) Put the same value into «Max. HP bar value»
text field in HP \ Damage Customizer.
3) Put the same value into
«Medkits
HP limiter» text field in HP \ Damage Customizer.
4) Press «recalculate
HP bar range» button in HP \ Damage Customizer.
5) Adjust «Normal-critical
threshold».
Stupid question: what if I get this error message?
This message means that you have set too low maximum health value. Minimum HP value is 202, and the maximum is 32767 (if you will set it higher, Lara will die).
Almost same parameters can be applied to air bar and sprint bar, except air restoration rate and motorbike nitro drain rate. It defines how quickly air / bike nitro will be replenished / drained.
8.9.: Object (trap) Customizer.
Since ages, some TR objects had hardcoded parameters that couldn't be modified. For example, spikes, which retract and extract with fixed (hardcoded) intervals. Or it's boulder gravity, or raising block height… Trap Customizer allows you to modify some of these hardcoded values, and this way you can drastically change your game's feeling by creating completely new traps with modified parameters!
Two block platform sub-section
Invert movement direction: many TR builders complained that they can only raise two-block platform, not lower it. Well, say thanks to our dearest Core Programmers for this. «As an experts in Tomb Raider, we decided that you don't need to lower any platforms in your game, only raise them» — very optimistic point of view, isn't it? Unfortunately, not everyone so optimistic as Core programmers, so now you can invert two block platform movement direction and create elevators that will not go up, but go down instead.
OCB 0 mode only options: these
four parameters valid for customizing TWOBLOCK_PLATFORM
only in depress mode (OCB 0). Again, you think it's useless? Now let me tell you
something. Do you remember hanging block puzzles from TR7? I. e. when you need
to jump to other block before it will fall too low? So, with these options you
now can create same puzzles — scales puzzles, hanging block puzzles, and many
many more… By varying depression distance parameter, you can create
different types of platforms that will fall down at the specific height that
you maybe will need in your level. Note that depression and repression
speed can be modified SEPERATELY! It means you can create platforms that
will fall very quick under Lara's height, but they will need much more time
to restore their initial height when Lara leaves it. Also there is another invert
movement direction option, but it's only valid for OCB 0 mode.
One
example: imagine that Lara should jump from one platform to other before platform
will go too low or too high, or else she won't be able to grab next platform
or get into small cavern… It's a wonderful potential for creating this kind
of puzzles!
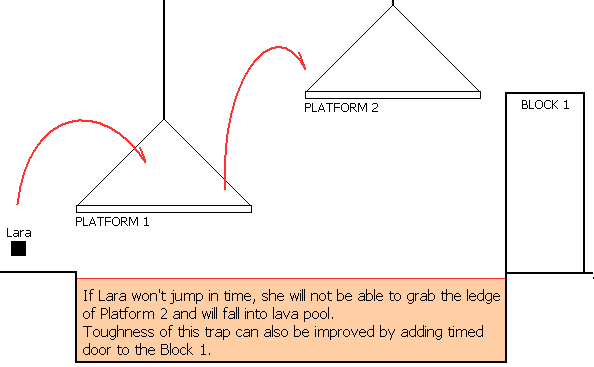
Please remember that
if you're using platform(s) that will descend into water rooms, you shouldn't
allow them to descend lower than 2 clicks, or else Lara will stuck in the floor.
One block platform sub-section
Warning:
this feature requires «Extend tomb4.exe size» option.
If
you will look closer, you will notice that TR4 engine contains a lot of abandoned
features. For example, if you will look at OBJECTS.H file, you will notice
a lot of undocumented objects — like TRIPWIRE, DIARY_ITEM, ONEBLOCK_PLATFORM
and so on. Unfortunately, Core never wrote a single line of code for these objects,
and object slots itself were left empty. Fortunately, TR4 still contains entries
for such objects. Therefore, it is possible to make these abandoned objects
functional!
So this sub-section allows you to make ONEBLOCK_PLATFORM item
active. Note that you can change behaviour for this item seperately — it means
you now can have two platforms with different parameters in your level!
For example, you can create platform that goes up in ONEBLOCK_PLATFORM slot
and platform that goes down in TWOBLOCK_PLATFORM slot!
Spikes sub-section
Joby
stretch speed: maybe you've seen this trap in one of the last TR4 levels.
Joby spikes is a spikes that begin to spin and stretch to the bottom of the
room. Speed of this stretching is hardcoded, but now you can change it precisely.
In the meaning of the gameplay, you can create a room in which some operation
should be completed in the precise time before Joby Spikes will get Lara (for
example, you can use some pushable objects to work with, or you can create
«crossover room» with Joby Spikes, where Lara should return after
some action in other room and then do some action in it — and all this
before Joby Spike will get her).
Normal spikes timer: this option was moved from Physics Customizer. As you maybe already understood, it will modify TEETH_SPIKES cycle delay. You can set it higher to create «inpassable» teeth spikes or lower to create «Phew, just in time» spike corridors etc. etc.
Retraction speed: modifies
speed of normal spikes retraction/detraction.
Darts sub-section: nothing so much new here — darts colour, interval and speed. Increase interval and speed — and you will create more difficult trap to overcome. Also, you can set darts colour to RGB(0,0,0) (so darts won't be visible), create static mesh with no collision and texture it like laser beam (good point to use UVRotate or animated textures here), decrease darts interval to minimum and create an illusion of harmful lasers, like in TR3 or TR5.
Raising / expanding
block options — height and raise anim speed: two options for BOTH raising
blocks and EXPANDING PLATFORM. Why they have no separate settings? Reason is
Our Dearest And Wiseful Core Design Programmers decided to use ONLY ONE CODE
PIECE for all these three objects.
In other words, Raising Block 2's height will
be ALWAYS equal to TWO Raising Block 1 heights, and Expanding Platform's height
will be equal to Raising Block 1 height.
Link fake height option allows
you to link visible mesh height to real collision height. You can use this option
if you don't want to edit raising block meshes, but with this option Expanding Platform won't work correctly anymore (i. e. its visible expanded
width will not be equal to actual collision, but maybe you can get along by
modifying Expanding Platform mesh).
Falling block
options: timer and tremble value. Timer can be used to increase
or decrease delay before Falling Block collapse. Very useful for creating «just
in time» traps (you can fine-tune timer and then create, for example, collapsible
bridge which will need Lara to use sprint, or else falling block will fall before
she will manage to pass it). Also you can use small timer values for creating
«Indiana Jones and the Last Crusade»-like puzzles, when Lara will
need to step onto certain squares, or else she will immediately fall into an
abyss.
In contrary, you can INCREASE timer and create another «just
in time» puzzle, when Lara will need to do some action before floor will
collapse under her.
Tremble value can be useful if you don't want
to show player that he is standing onto falling block.
Squishy Block 2 sub-section: it modifies Squishy Block 2 options. What's the squishy block 2? It's the final trap in TR4, when Lara goes through a room with skulls on the ceiling, and if she will stand too much under it, Squishy Block 2 will make his appearance and will squish Lara into a slight amount of guts. So now you can change its timer and tremble value (parameters similar to same Falling Block parameters). More checkbox will reorganize code a bit, so you will be able to use bigger timer values (by default, TR4 engine allows you to use values only up to 127). Note that no any tremble checkbox WILL NOT turn off «final tremble» which happens when squishy block falls down (for modifying this «final tremble», use corresponding textbox), but will turn off «squishy block in the process» tremble.
«Other
objects» sub-section:
Boulder gravity: increase or decrease
it, and boulder will be more or less heavy. Note that values more than 15 will
cause permanent tremble around boulder, even if it's completely stopped.
Slicer-dicer
speed: speed for infamous Slicer-Dicer trap from TR4's The Tomb of Seth.
Slicer-dicer
radius: multiplier for Slicer-Dicer radius. Every time you will increase
it by 1, radius will be doubled.
Lightning conductor interval: specifies
interval for lightning conductor object.
9.0.: Flipeffect Editor and FURR language — learning the basics
Flipeffect Editor is a small editor with special
command language (shortly named FURR — from Flipeffect User-Related
Repository) and syntax system that allows you to create USER-DEFINED FLIPEFFECTS.
It's not like you have some fixed amount of fixed flipeffects, and you stick
to it, and you can't modify them. No. You can create YOUR OWN FLIPEFFECTS from
scratch! It means, if you want to create flipeffect that will add some key or
remove all weapons from inventory, then go for it! If you want to create flipeffect
that will slowly drain or replenish Lara's HP, then go for it! If you want to
create flipeffect that will move Lara or any item to any position in your level
or play any animation — you can do this! Even more, if
you have some assembly language skills, you can create not only flipeffects,
but also COMMANDS for these flipeffects! Then you can share your skills with
all TRLE builders and release your custom command file with new commands!
But,
since you're supposedly a beginner, let's learn the basics of Flipeffect Editor.
Here it is:
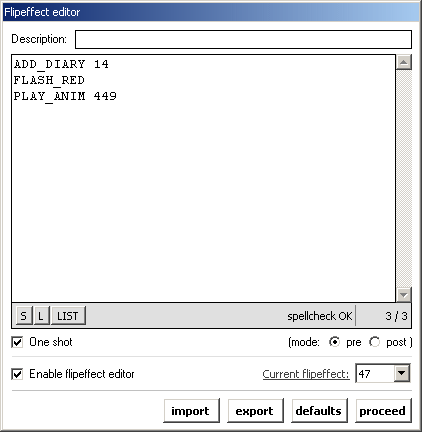
Largest text box (with slider on
its right side) is a box where you will enter new commands for your flipeffect.
Small textbox at the top side of window (entitled «Description») is
a description for your flipeffect.
Under the main large text box there is
a «gray zone» with three buttons and two text labels:
[S] button: initiate
spellcheck (i. e. checking for syntax errors and wrong commands) for ALL
flipeffect slots.
[L] button: reload command file (you can specify
any syntax file, not only default «syntax.fln», like on start-up)
[LIST]
button: creates a list of all available commands.
code status label: this
label («spellcheck OK» by default) will inform you about any errors
found in your command sequence.
line number label: this label tells
you overall amount of lines in current command sequence and line you're currently
pointing to.
One shot checkbox allows you to create one-shot flipeffect that will execute only once when Lara is on trigger.
Pre / post mode switch specifies one-shot flipeffect mode. «Pre» mode means that flipeffect will be stopped immediately, and «post» mode means that flipeffect will be stopped only in the end of the code. You MUST use «post» mode, if you want to create, for ex., soundtrack trigger that will play if Lara surfacing the water (like in TR1-3 Lara's home and TR4's «your average priceless seaweed» cutscene).
Enable flipeffect editor checkbox will, indeed, enable Flipeffect Editor. If you won't enable this option, you won't be able to do anything in Flipeffect Editor, and no any custom flipeffects will be written to executable.
Current flipeffect combobox
specifies flipeffect you're currently editing. By default, custom flipeffect slots begin
from 47 (since last hardcoded TR4 filpeffect is 46) and end with 146. Therefore,
you have 100 different flipeffect slots. When you changing flipeffect
slot with this combobox, it will save all changes you've made to previous slot.
If (somehow!) you've filled all
100 flipeffect slots, you can increase slot amount in config file. Just find
TriggerSlots=100 line in the beginning of trep.cfg and set it to anything you want
(up to 512).
Flipeffect Editor hotkeys
F1 — opens command list for quick reference.
F2
— brings up navigation box (you can quickly navigate through filpeffect
slots with it)
F3 — initiates spellcheck for current
flipeffect.
IMPORTANT: since TREP 0.72 revision 6, RETN command added automatically to the end of each flipeffect code. So you don't need to use this command anymore.
Some commands are plain commands
without any additional parameters required. You simply enter this command and…
that's it. But some commands will require additional values (one or two), so
you must also enter these parameters. For example, if you want to enter command
that will decrease Lara's HP, you should enter VALUE which will specify speed
of HP decreasing.
In case command uses these parameters, it will be shown
in square brackets with description of parameter type in it. For example, DEC_HP
[values 0-32767].
PLEASE REMEMBER: if command have extra parameter, this parameter should be entered WITHOUT SQUARE BRACKETS.
STOP
This
command will stop flipeffect execution if you will leave trigger sector. If
you WON'T use this command, flipeffect will be active even after you will leave
trigger sector! So this command is very important when creating HP decrease
/ earthquake / etc. triggers, since without it flipeffect will continously execute
even after Lara will leave trigger sector! Do
not use this command with «One shot» flipeffect, because then it will act
in opposite way!
Also
you need this command when triggering flipeffect with flyby camera.
Thanks
to Paolone for discovering this command!
RESET
Completely resets
any flipeffect information (i. e. current active flipeffect and last activated
one-shot flipeffect).
Thanks
to Paolone for discovering this command!
ONESHOT_STATE
[your flipeffect number] [0 or 1]
Manually resets one-shot
data for specified flipeffect. Useful if you want to re-activate
already triggered one-shot flipeffect, or, on contrary, to
manually disable some flipeffect.
Example: ONESHOT_STATE 47
0 — reset flipeffect
47 one-shot state to 0, so it can be activated again.
INC_HP [value 0-32767,
specifies HP replenish speed] [value 0-32767, specifies overall HP limit]
Useful
when creating «first-aid zones», like medical stations in Half-Life
games. You can use it if you don't want player to use medkits but want to replenish
HP in specific zones.
First parameter specifies speed of HP restoring,
and second one specifies HP limit after which HP restoring will stop (normally,
this parameter should be equal to max. HP value specified in Limit Sub-Customizer,
but if you want your HP restore point to replenish only half of Lara's HP, you
can specify different parameter).
Example: INC_HP 5 1000 — slowly
replenishes Lara's HP until it's 1000.
DEC_HP [values
0-32767, specifies speed of HP decreasing]
This command will decrease
Lara's HP with specified speed. You can use this command to emulate various
hazardous environments, like poison coolant zones in TR7 or hot/cold water zones.
Also you can combine this command with animating objects or textures and therefore
create illusion of some harmful moving object or land. Also you can combine
it with shallow water and create illusion of harmful quicksand (like in TR3).
Example:
DEC_HP 5 — slowly drains Lara's HP.
INC_AIR [value
0-32767, specifies air replenish speed] [value 0-32767, specifies overall air
limit]
This command can be used only in water rooms. Usage similar to
INC_HP command.
You can use this command to create «air supply points»
in large pool areas (like it was done in Rayman 3).
DEC_AIR [value
0-32767, specifies speed of air decreasing]
Will decrease air points.
This command also works only in water rooms. You can use it to speed-up air
decrease speed in certain zones of your water rooms to make realistic approach
(for ex., you can increase air decrease speed in sink zones or in cold water
zones).
INC_SPRINT
[value 0-32767, specifies speed of sprint increasing]
Increases
sprint points with specified speed.
DEC_SPRINT
[value 0-32767, specifies speed of sprint decreasing]
Decreases
sprint points with specified speed.
SET_POISON [value
0-32767, specifies strength of poison attack]
Can be used to add/remove
poison. 0 will remove any poison, and other values will poison Lara with specified
speed (although it only affects «trip effect» power, but not HP decrease
speed).
Example: SET_POISON 0 — cures Lara.
KILL_LARA
Kills
Lara Croft immediately. Similar to DEATH trigger, but without stupid fire effects
all around.
LARA_ON_FIRE
This
command will simply set Lara on fire, like any flame emitter does.
START_TIMER
Starts
racetimer from zero.
START_TIMER_FROM
[minutes:seconds.fractions]
Starts timer from specified time. It is useful if you're
using countdown race timer (see Race Timer Editor section) and want to
specify initial time.
Please
note that seconds parameter allows you to enter not only whole numbers,
but also fractional numbers. Therefore, you can specify fraction of seconds.
Example:
START_TIMER_FROM 01:15.03 — starts timer from 1 minute, 15 seconds and
3 fraction of second.
SET_TIMER [minutes:seconds.fractions]
Overrides
current timer value with specified one.
Example: SET_TIMER 02:00 — overrides
current timer value with 02:00.
FREEZE_NORMAL_TIMER
Compensates
normal timer increasing with DECrease command. I. e., normal timer
will freeze. If you will use this command with inverted timer, time will decrease
with double speed. Also, if you will place more than one FREEZE_NORMAL_TIMER
command in a row, timer will invert at this point (for normal timer) or will
count with triple/quad etc. speed (for inverted timer).
FREEZE_INVERTED_TIMER
Same
as with FREEZE_NORMAL_TIMER, but compensates timer value with INCrease command.
STOP_TIMER
Stops
and hides racetimer.
SET_LEGEND_TIME
[values 0-255]
If set more than 0, immediately will show legend string for corresponding
time span.
If set to 0, will hide legend string (useful when you have two-way
level with legend and want to disable legend at return start position).
Example:
SET_LEGEND_TIME 100 — will show legend for a brief time.
SET_LEGEND_STRING
[values 0-255]
Replaces legend string with corresponding string # specified
in ENGLISH.TXT. Counts from 0.
Also note that you can use abandoned [PSXStrings]
entry as additional string repository (about 42 additional strings) for your
extra legends.
In combination with SET_LEGEND_TIME command, you can
use it to create LOTS of additional legend strings that will appear as soon
as player will step onto flipeffect.
Example 1: SET_LEGEND_STRING 6 —
replaces
legend string with «Valley Of The Kings» text (string # 7 in ENGLISH.TXT).
Thanks
to Harly Wuson for this command!
EQUIP [item type
constant]
Equips or unequips any weapon or item (except torch). For example,
when this flipeffect is activated, Lara will equip pistols, shotgun, crossbow,
flare etc. Also note that you can use these commands during flybys, so you can
force Lara to light a flare or holster/unholster any weapon even if controls
are locked in camera's properties.
Possible constants that can be used: NOTHING, PISTOLS,
SHOTGUN, UZIS, REVOLVER, GRENADEGUN, CROSSBOW, FLARE.
Example 1: EQUIP
FLARE — Lara will immediately take out and light a flare.
Example 2:
EQUIP NOTHING — Lara will put back any weapon or throw out flare.
HOLSTER_WEAPONS
If
Lara has any weapon in her hands, she will put it back into holsters. This command
useful when you want to remove some weapon (or remove all weapons) and don't
want Lara to stuck with «virtually removed» weapon in her hands. Note
that player won't be able to draw weapon until he will leave this trigger sector
(you can create some tricks with this effect, like denying weapons in specific
areas).
EMPTY_HOLSTERS
Removes
any weapon mesh from holsters. Should be used with weapon removal commands.
EMPTY_BACKDRAW
Removes
any weapon mesh from backpack (shotgun, grenadegun, crossbow). Should be used
with weapon removal commands.
Thanks to MontyTRC for discovering this command!.
FILL_HOLSTERS
[mesh type constant]
Fills holsters with specified mesh.
Constant can be PISTOLS, UZIS and REVOLVER.
Example: FILL_HOLSTERS
UZIS — fills holsters with uzi meshes.
FILL_BACKDRAW
[mesh type constant]
Same as for FILL_HOLSTERS, but for shotgun,
grenade launcher and crossbow. You can use it with SHOTGUN, GRENADEGUN
and CROSSBOW constants.
Example: FILL_BACKDRAW CROSSBOW
— fills backdraw with crossbow mesh.
DEACTIVATE_WEAPONS
Disables
«Draw weapon» key until player will pick up weapon again and select
it in inventory. Should be used with weapon removal commands.
ACTIVATE_PISTOLS,
ACTIVATE_UZIS, ACTIVATE_REVOLVER, ACTIVATE_SHOTGUN, ACTIVATE_GRENADEGUN,
ACTIVATE_CROSSBOW
Contrary to DEACTIVATE_WEAPONS command,
this command activates corresponding weapon.
REMOVE_PISTOLS
Quick
command to remove pistols from inventory. Remember to use it in combination
with DEACTIVATE_WEAPONS, EMPTY_HOLSTERS and HOLSTER_WEAPONS commands.
SET_BINOCULARS
[0 or 1]
Removes (0) or puts (1) binoculars in inventory.
SET_LASERSIGHT
[0 or 1]
Removes (0) or puts (1) lasersight in inventory.
SET_CROWBAR [0
or 1]
Removes (0) or puts (1) crowbar in inventory.
REMOVE_ALL_GUNS
Quick
command for removing ALL GUNS AND AMMOS from inventory. Also this command includes
all necessary holster and deactivate weapon commands.
CALL_FLIP [0-46]
Calls
any old flipeffect number (0-46). You can use it to combine some flipeffects
within one command sequence.
You can't call your own flipeffects with it!
MOV_BYTE [hexadecimal
address constant] [byte value 0-255]
Moves byte value at specified address.
Similar to MOV BYTE PTR DS:[address],[value] assembly command.
Useful when
you need to modify certain value in TR4 memory.
MOV_WORD [hexadecimal
address constant] [integer value 0-65535]
Moves integer value at
specified address. Similar to MOV WORD PTR DS:[address],[value] assembly
command.
Useful when you need to modify certain value in TR4 memory too.
MOV_DWORD [hexadecimal
address constant] [long value 0-4294967295]
Moves long value at
specified address. Similar to MOV DWORD PTR DS:[address],[value] assembly
command.
And, again… It is really useful when you need to modify certain
value in TR4 memory!
ADD_KEY [KEY_ITEMx
constant]
Adds specified key to inventory. Parameter IS NOT numerical
parameter, but special key constant KEY_ITEMx, where x — key
number.
Example: ADD_KEY KEY_ITEM2 command will add key #2 to inventory.
REMOVE_KEY [KEY_ITEMx
constant]
Removes specified key from inventory. Parameter IS
NOT numerical parameter, but special key constant KEY_ITEMx, where
x — key number.
Example: REMOVE_KEY KEY_ITEM2 command will
remove key #2 from inventory.
ADD_QUESTITEM [QUEST_ITEMx
constant]
Adds specified quest item to inventory. Parameter IS NOT numerical
parameter, but special quest item constant QUEST_ITEMx, where
x — quest item number.
Example: ADD_QUESTITEM QUEST_ITEM1 — adds
Amulet of Horus to inventory.
REMOVE_QUESTITEM
[QUEST_ITEMx constant]
Removes specified quest item from inventory.
Parameter IS NOT numerical parameter, but special quest item constant QUEST_ITEMx,
where x — quest item number.
Example: REMOVE_QUESTITEM QUEST_ITEM2
— removes Breast Plate from inventory.
ADD_EXAMINEx
…where
x — 1, 2 or 3. Adds specified EXAMINE item to inventory. Note that examine
number is not a parameter, but part of a command.
Example: ADD_EXAMINE2
— adds EXAMINE 2 item to inventory.
Thanks to Harly Wuson for these
commands!
REMOVE_EXAMINEx
Similar
to ADD_EXAMINEx, but removes specified examine item from inventory
Example:
REMOVE_EXAMINE3 — removes EXAMINE 3 item from inventory.
Thanks
to Harly Wuson for these commands!
SET_PUZZLEITEM
[PUZZLE_ITEMx constant] [amount of item 0-255]
Sets (overwrites) specified amount
of specified puzzle item (NOT puzzle combo or quest items!) to inventory. Parameter IS
NOT numerical parameter, but special puzzleitem constant PUZZLE_ITEMx, where
x — item number.
Note that it won't add item, but OVERWRITE current
item amount. I. e., if you have one Canopic Jar 1 in your inventory, and
you will step onto flipeffect with SET_PUZZLEITEM PUZZLE_ITEM2 0 command,
amount of Canopic Jars 1 in your inventory will be set to 0.
Example 1: SET_PUZZLEITEM
PUZZLE_ITEM4 1 — sets one puzzle item 4 in inventory.
Example 2: SET_PUZZLEITEM
PUZZLE_ITEM4 0 — sets NO ANY puzzle item 4 in inventory (i. e.
removes such puzzle item from inventory).
ADD_PUZZLEITEM
[PUZZLE_ITEMx constant] [amount of item 0-255]
Adds specified amount
of specified puzzle item. Usage similar to SET_PUZZLEITEM command.
ADD_PUZZLECOMBO
[COMBOx_y constant]
Adds specified puzzle combo item to inventory. Parameter
should be special constant representing combo item ID.
Example: ADD_PUZZLECOMBO
COMBO5_1 — adds puzzle item 5 combo 1 to inventory.
Thanks to
MontyTRC for this command!
SET_SUPPLY [supply
constant] [amount of supplies 0-32767]
Sets (overwrites) specified amount of units
for specified supply ID.
Supply constant can be: PISTOL_AMMO, UZI_AMMO,
SHOTGUN_NORMAL_AMMO, SHOTGUN_WIDESHOT_AMMO,
REVOLVER_AMMO, GRENADE_NORMAL_AMMO, GRENADE_SUPER_AMMO, GRENADE_FLASH_AMMO,
CROSSBOW_NORMAL_AMMO, CROSSBOW_POISON_AMMO, CROSSBOW_EXPLOSIVE_AMMO, SMALL_MEDKIT,
LARGE_MEDKIT, FLARES.
Example: SET_SUPPLY CROSSBOW_EXPLOSIVE_AMMO 54 —
sets crossbow explosive ammo amount to 54.
ADD_SUPPLY [supply constant]
[amount of supplies 0-32767]
Adds specified amount of units for specified
supply ID. Usage similar to SET_SUPPLY command.
ADD_WEAPON [weapon constant]
Adds
specified weapon (NOT ammo) to inventory. Weapon constant can be: PISTOLS,
UZIS, SHOTGUN, CROSSBOW, GRENADEGUN, REVOLVER.
Example: ADD_WEAPON SHOTGUN
— adds shotgun to inventory.
REMOVE_WEAPON [weapon constant]
Removes
specified weapon (NOT ammo) from inventory. Weapon constant can be: PISTOLS,
UZIS, SHOTGUN, CROSSBOW, GRENADEGUN, REVOLVER.
Example: REMOVE_WEAPON
SHOTGUN — removes shotgun to inventory.
SET_WATERSKIN1 [0-6]
Sets
(overwrites) current small waterskin value in inventory. 0 means no small waterskin
at all, 1 means empty waterskin, 2 means waterskin with 1 litre of water, and
so on.
Example: SET_WATERSKIN1 3 — adds small waterskin with 2 litres
of water to inventory.
SET_WATERSKIN2 [0-6]
Sets
(overwrites) current large waterskin value in inventory. 0 means no large waterskin
at all, 1 means empty waterskin, 2 means waterskin with 1 litre of water, and
so on. Usage similar to SET_WATERSKIN1 command.
Example: SET_WATERSKIN2
3 — adds large waterskin with 2 litres of water to inventory.
PICKUP_ITEM [pickupable
object ID]
This is common command for adding ANY pickupable
items in inventory. It will act just like when Lara have picked
up item in game — engine will show you rotating item in the bottom
right corner.
Example: PICKUP_ITEM 353 — add shotgun
to inventory.
DRAW_ITEM [pickupable
object ID]
Similar to PICKUP_ITEM command, but instead it'll
simply draw pickupable item on-screen, without adding it to inventory.
PLAY_SAMPLE [0-32767]
Plays
specified sound sample ID. Mostly, this command is useless in Flipeffect editor
(because TR4 already have flipeffect for this action), but
you can successfully re-use this command in Race Timer Editor.
Example: PLAY_SAMPLE
3 — plays sample ID #3.
PLAY_SOUNDTRACK [0-127]
Plays
specified audiotrack. Maybe it's useless in Flipeffect editor too (since TR4
already have PLAY_SOUNDTRACK trigger event), but again,
it can be VERY useful in Race Timer Editor (for example, to play certain audiotrack
at the certain moment).
Example: PLAY_SOUNDTRACK 52 — plays 052.wav audiotrack.
PLAY_ANIM [0-32767]
Plays
any Lara's animation.
You must use this command ONLY
WITH ONE-SHOT OPTION ENABLED, OR ELSE ANIMATION WILL FREEZE.
The
power of the Dark Sid… oh damn, sorry. I mean, the power of the PLAY_ANIM
trigger is almost unlimited, and it can allow you to create tricks like this:
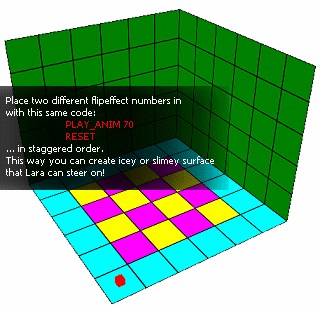
Until now, it was only possible
to create same effect with a lot of dummy BRIDGE_FLAT objects and dummy
rooms with slanted floor!
Another important thing is PLAY_ANIM command
allows you to create in-game cutscenes without cloning Lara into animating
slots and without additional .tr4 cutscene files. Only one limitation is you
can't use speechheads.
LOAD_LEVEL [level number 0-127]
Loads
specified level number. Similar to END_LEVEL trigger command, so it's useless
in flipeffect editor. But you can use this command in race timer editor to load
specified level at specified time.
FLASH_RED, FLASH_ORANGE, FLASH_YELLOW,
FLASH_GREEN, FLASH_LIGHTGREEN, FLASH_BLUE
These commands will flash the
screen with specified colour. Effect is similar to Amber Light explosion or
Baboon teleportation. Also
note that these commands are very useful with Race Timer Editor, because you
can emulate self-destruct explosion effect with it.
Also
it's recommended that you will use this command in «one-shot» mode,
or else flash will continously pulsate (but you indeed can use this effect to
emulate «painful heartbeat» in combination with DEC_HP command).
SHAKE_CAMERA [-1000-0]
When
parameter is set to NEGATIVE value, it will shake the screen with specified
power (-10 will give you small camera shake, and -600 will produce absolutely
insane shake effect which in combination with FLASH commands can be useful
for self-destruction special FX emulation). Positive values seems to do nothing
but moves camera to the floor.
Example: SHAKE_CAMERA -100 — shake
camera with power of -100.
SHAKE_CAMERA_SOFT,
SHAKE_CAMERA_MEDIUM, SHAKE_CAMERA_HEAVY
If you don't want to look into
SHAKE_CAMERA command parameter, you can use these shortcut commands instead.
As you understand, soft gives soft tremble, medium gives medium, and heavy gives
you heavy tremble.
LARA_DRIPS
[amount of drips 0-255]
Initiates water dripping effect on
Lara. If you will set amount of drips to 255, dripping effect will
be unstoppable until you'll jump into water.
Example: LARA_DRIPS
150 — adds medium amount of drips to Lara.
BLEED
Bleeds
Lara. You can use this command to bleed Lara in specific sectors
(for ex., if you want to emulate harmful environment, like insect swarms
in Silent Hill 3 or Diablo II games).
UVROTATE [-127-127]
Specifies
speed of scrolling animated textures (UV Rotate). Please remember that you should
use this command with NOT one-shot flipeffect and apply it in EVERY POSSIBLE
ZONE where player will be able to see scrolling textures with
specified custom speed, because animation speed will reset to default, if player
will reload his game.
Thanks
to Harly Wuson for this command!
SPEEDUP
This
nifty command will double speed of engine timers (except UV Rotate graphical
method and certain other visual effects, like gunfire animation). You can't
use two or more such commands in a row, because then engine will hang.
SPEEDDN
Slows
down engine. Can be used to simulate slo-mo effect (like in Max Payne).
You
can use two or more commands in a row, and engine will act slower and slower
in specified flipeffect sectors. But note that it will also slow down camera
timer, so it won't look smooth.
ORIENTATE [-32767-32767]
Orientates
Lara to specific direction. You can use this command to deny player to
go to certain locations in combination with CHANGE_POSITION command and some sound sample playing, for example,
Lara's «No.» This method is far more realistic than stupid «transparent
wall» limiter.
Examples:
ORIENTATE 0 — orientates
Lara to the North.
ORIENTATE 32767 — orientates Lara to the South.
ORIENTATE
16384 — orientates Lara to the West.
ORIENTATE -16384 — orientates
Lara to the East.
Thanks to Harly Wuson for discovering this command!
ROTATE [-32767-32767]
Continously
rotates Lara with specified speed (positive numbers will rotate to the right,
and negative numbers will rotate to the left)
CNANGE_ACCEL
[acceleration value]
This command can be used to override
current Lara's horizontal acceleration. You freakin' MUST use
this command, if you will decide to create cutscenes with PLAY_ANIM
command, or else player will be able to corrupt cutscene positioning
by jumping over flipeffect. Just set it to CHANGE_ACCEL
0, and acceleration and speed will reset to zero.
CHANGE_ACCEL_VERT
[acceleration value]
Same as previous command, but for VERTICAL
acceleration value. You also MUST use this command if you'll create
cutscenes with Lara to reset her acceleration.
CHANGE_POSITION_X
[coordinate], CHANGE_POSITION_Z [coordinate]
These two commands will
change
Lara's X and Z position. You can use them to quickly teleportate Lara in
the room. However, dealing with global coordinates may be a pain, so possibly it's
easier to use Lara Position Changer object from Tomo's engine update patch (available
at laraslevelbase.org).
You can use these commands to deny Lara's movement
in certain direction (for example, if you're creating 2D-like sidescroller game).
Coordinate
parameters are LONG (i. e. -2147483647 —
2147483647) numbers which represent TR4 global coordinates.
CHANGE_POSITION_Y
[coordinate]
This command is a bit buggy. It forcedly changes Lara's
current Y position (height), and it result in denying jumping and any other
actions that should modify Y coordinate. But you can use this command to force
Lara appear at the certain height in room if, for example, you want to play
a cutscene with «Play any animation» command or if you simply want
to teleport Lara at the certain point in your level.
Coordinate parameter
is LONG (i. e. -2147483647 — 2147483647)
number which represent TR4 global coordinate.
CHANGE_ROOM
[room #]
Changes current Lara's room number. With this command,
in combination with CHANGE_POSITION commands, you can change
Lara's position between rooms. Important: you must use CHANGE_ROOM
command BEFORE CHANGE_POSITION commans, or else Lara object
will be corrupted and you'll need to restart level.
Thanks
to Harly Wuson for discovering this command!
CAMERA_FOLLOW
Immediately
puts camera back at the Lara's position. Can be useful to fix camera
position after using CHANGE_POSITION commands et cetera.
Thanks
to Harly Wuson for discovering this command!
LOCK_CONTROLS
Locks
controls.
UNLOCK_CONTROLS
Unlocks
controls.
USE_BINOCULARS
Sets
binoculars to active state.
Thanks to Nowid50 for discovering
this command!
ADD_POSITION
[speed of moving X -2147483647-2147483647] [speed of moving Z -2147483647-2147483647]
Continously
adds specified values to Lara's position. I. e., until Lara is in this flipeffect
zone, she will be smoothly moved to the specified direction. It may be
easier if you will look at this example:
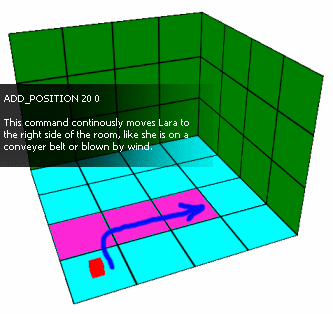
In other words, this command can be called «land sink» in opposition to «water sink» method in TR engine. But if you will decide to use this command for emulating wind or transporter that should throw Lara into an abyss or deep pit, you should know about TR4 engine bug, which will allow player to stay «on the edge of the abyss», until he will stand still and won't make any moves, if speed of moving parameter is less than 110.
MOVE_ITEM_X [raw
item ID] [coordinate]
MOVE_ITEM_Y [raw item ID] [coordinate]
MOVE_ITEM_Z
[raw item ID] [coordinate]
These three commands can move items (NOT
Lara, but other items, like enemies or boulders) on the map. But you can
use it only with ACTIVATED items, or else their position will reset to defaults
when you will re-load your game.
Raw item ID can be discovered with FexInspect
program. Just open your level file with it and find desired item in the list
and remember its number in the list — that is the raw item ID. Coordinates are,
as always, TR4 global coordinates (equal to ones shown afterr «t»
label, when you're pressing F1 key during gameplay).
KILL_ITEM [raw
item ID]
Kills specified item. You may think that word «kill»
applicable only to baddies, but you're wrong. You can kill ANY item. Even two-block
platforms, ropes and boulders! This is useful if you want certain baddy to be
removed from the map, or you want to open some passage that was previously blocked
by platform. Also note that item will not appear again after killing, if
you will reload level.
SHATTER_ITEM
[raw item ID]
Similar to previous command, but kills item
with old-school «shatter to meshes» effect.
You FREAKIN'
MUST use STOP command after this command, and also create one-shot
flipeffect, because this command can be used ONLY ONCE with every
item, or else game will crash!
SET_HP [raw item
ID] [HP value]
Overrides specified item's health points. As with KILL_ITEM
and MOVE_ITEM commands, to override some enemy's health points, you must
know his raw item ID. Then, you simply create flipeffect which will set more
HP, and… voila! You have two baddies in the same slot with different health
points!
In fact, this can be useful, if you want to create some complications
for player during the boss fight or to make some nasty trick to disable player's
ability to kill some certain baddy fast. For example, you can combine this command with
timer editor, and if player won't manage to destroy some enemy in time, enemy's
HP will be increased.
MOVE_MIRROR [room
number 0-255] [mirror border world coordinate]
TR4 engine allows only
one mirror to be in level. Thus, to create mirrors in multiple zones (not only
in one room in the whole level), you can change mirror's room location and mirror
border coordinate. But remember that mirror coordinates will reset to SCRIPT.DAT's
defaults with every level restart, so be sure that corresponding flipeffect
will be activated when player can see your mirrors!
LOAD_GAME
Shows
«Load Game» dialog. Can be used if you want player to activate load
game dialog at the certain points.
SAVE_GAME
Same
as with LOAD_GAME, but shows save game dialog. In combination with «Disable
in-game save» feature, can be used to create savegame checkpoints.
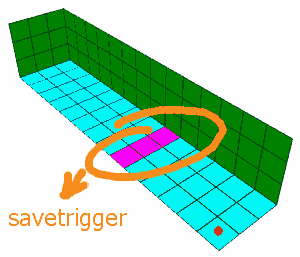
Warning: this command replaces old pre-0.72 «FE 40/41 save» option, because it was too buggy. If you already have a project with savetriggers, all you need to do is to replace 40/41 savetrigger flipeffects with new ones created in Flipeffect Editor.
SHOW_STATS
This
command immediately shows statistics screen. Can be used in combination
with END_LEVEL trigger to show final level statistics or final game
statistics.
SHOW_INVENTORY
Shows
inventory screen.
DRAW_BMP
[file number -99-99]
Pauses game and draws BMP file from
corresponding file number from -99 to 99 placed in /pix subdirectory
until player will press ESC or ACTION key. Optimal resolution is
640x480. Can be used to create intro/outro screens and Max
Payne-like graphic novels (you can use several DRAW_BMP commands
in a row with PLAY_SOUNDTRACK and/or PLAY_SAMPLE commands inbetween).
Examples:
DRAW_BMP 52 —
draws /pix/52.bmp file.
DRAW_BMP -7 —
draws /pix/-7.bmp file.
PLAY_FMV [file number
0-99]
Plays .bik file placed into /fmv subdirectory. For
ex., if set to 15, it will play file fmv15.bik. This command
is only available when «Enable Bink videos playback»
DRACO
custom patch is activated.
Examples:
PLAY_FMV
2 — plays /fmv/fmv02.bik file.
PLAY_FMV
52 — plays /fmv/fmv52.bik file.
ADD_DIARY [0-65536
number of STRINGS2.TXT string]
This command must be used
ONLY with «Multi-purpose
LOAD GAME item» DRACO
custom patch.
It allows you to spawn extra diary record and this way unlock
new diary entries for player's eye. Parameter specifies number of
string in STRINGS2.TXT file to assign for diary entry. For example, if you will use
ADD_DIARY 6 command, there will be new diary record, which
will contain string number 6 from STRINGS2.TXT file. Note that this
way you now can add diary records in ANY order, which is very important
for non-linear scenarios. Remember that first reserved string for
diary in STRINGS2.TXT file counts as string number 5!
Examples:
ADD_DIARY 5 —
adds new diary record with string #1 in it.
ACTIVATE_BAR
If
you have enabled multi-purpose bar DRACO patch, this command will
set this bar to active state and its value will continously decrease.
DEACTIVATE_BAR
Same
as above, but DEactivates MP bar and allows it to restore its value.
ACTIVATE_ITEM [raw
item ID]
Activates specified item. Can be useful in combination
with various conditional directives (i. e. you now can activate
item only if Lara HP is at certain value, or if Lara is pointing
at certain direction, or when certain button is pressed).
SWAP_INVENTORY
This
is very useful command. It replaces current player's inventory with
additional inventory buffer that is saved in extra savegame (that's
why this command requires advanced savegame management feature).
Each time you will use this command, player's inventory will be
swapped with inventory stored in add-on savegame. This way you can
have two separate inventories in your game if, for example, there
are two independent, but alternating storylines in your game.
When inventory is swapped, it is put into non-active state until
next SWAP_INVENTORY trigger, but it will be saved in each savegame
anyway.
Also you must note that when you're swapping inventory
first time, IT WILL BE ABSOLUTELY EMPTY (i. e. no any items except
save/load/diary). So you must fill new inventory with items by using
various add item commands.
Another thing to note is that if you've
completely changed player's weapons, you must use HOLSTER_WEAPONS,
DEACTIVATE_WEAPONS, EMPTY_HOLSTERS and/or EMPTY_BACKDRAW commands
to disable previously selected weapons. To enable some other weapon,
use corresponding ACTIVATE commands. To fill holsters with corresponding meshes,
use FILL_HOLSTERS and FILL_BACKDRAW commands.
SWAP_LARA_MESH [meshswap
item index] [Lara's mesh to swap]
One of the most powerful
commands which allows you to modify Lara's looks in-game. Simply
said, it's all your speechheads, hot-swapped outfits, custom dirty
meshes, wet meshes, bloody meshes, etc. More important is that meshswap
will indeed be saved after game reloading!
Thanks to Harly
Wuson for creating this command!
CHANGE_WEATHER [0
to 3]
When used in combination with «Enable weather» DRACO
patch, this command will change weather conditions in your level.
0 disables any weather, 1 sets it to rain, 2 to snow, and 3 to both
rain and snow.
NOP
This
command does completely nothing (NOP means No OPeration). You
can use it if you have compiled your level but later decided to remove certain
flipeffects from the map. You can replace your flipeffect code with this NOP
command, and thus create «empty» flipeffect that will do nothing.
***
9.2.: Conditional directives reference
What
is conditional directives? It's standard commands, but their purpose is not to do something in
your flipeffect, but to exit flipeffect if corresponding condition is not complied.
You can use these directives if you want to execute flipeffect only if corresponding
condition is complied or to interrupt flipeffect on certain stage of execution.
In the meanings of programming, it's equal to If [condition=true] then [execute
procedure] else [exit procedure] .
Please note that since version
0.743 you also can use such directives in Racetimer Editor, but ONLY
WITH (method: call) OPTION! Otherwise,
game will crash.
For now, there are two conditional directives:
ONLY_IN_WATER
This
command will deny to execute all following commands if Lara is not in water
room. Useful when you want to activate your flipeffect only in water rooms (e.
g., if you want to create cold water pool or other water-only effect).
You
should place this command before any other commands!
ONLY_ON_LAND
Similar
to ONLY_IN_WATER command, but, in opposition, it will deny to execute all following
commands only if Lara is IN the water. This is useful if you want to create
some hazardous environment that will hurt Lara if she is not in water.
You
should place this command before any other commands!
ENVIRONMENT [environment
type]
This is more flexible variation of ONLY_IN_WATER and ONLY_ON_LAND
directives. It allows you to select specific environment where flipeffect
will be activated.
Environment types can be:
0 — ground
1
— underwater
2 — water surface
3
— flight
4
— shallow water
Thanks to Harly Wuson for discovering this command!
IF_CARRY
GUNS
IF_NOT_CARRY GUNS
Two conditional directives that
acts like LARA_IN_COMBAT internal TR4 engine trigger type.
Thanks
to Nowid50 for discovering this command!
***
IF_LARA= [Lara's
parameter] [value]
IF_LARA!= [Lara's parameter] [value]
IF_LARA> [Lara's
parameter] [value]
IF_LARA< [Lara's parameter] [value]
IF_LARA>=
[Lara's parameter] [value]
IF_LARA<= [Lara's parameter] [value]
These
six directives allow you to interrupt flipeffect if certain Lara's parameter
is equal (=), not equal (!=), more (>) or less (<) than specified value.
With these directives you can create flipeffects that will only execute only
if, for ex., Lara's Y position lower or higher than specified value.
Possible
Lara's parameters are: LARA_Y, LARA_HP, ANIM_NUMBER, LARA_STATEID, LARA_ORIENTATION.
Example
of flipeffect with IF_LARA>= conditional directive:
STOP
IF_LARA>= LARA_Y
-600
KILL_LARA
This flipeffect will only kill Lara if her global Y coordinate (i. e. height) is more than -600. If, for example, Lara will put standable pushable block onto this trigger and then climb onto this pushable block (which will result in decreasing Lara's global Y coordinate lower than -600), flipeffect won't be activated! Please note that this directive uses ABSOLUTE global coordinates, which you can see while pressing F1 key in-game.
Another example of flipeffect with IF_LARA< conditional directive:
STOP
IF_LARA< LARA_HP
100
FLASH_GREEN
This flipeffect will flash screen with green colour only if Lara's health is lower than 100 points!
***
Keypress conditional directives
Keypress conditional directives can be used to prevent flipeffect execution if player haven't pressed some key, or, in contrary, HAVE pressed some key. For example, you can create cutscene that will be triggered only if player pressed ACTION key, or you can create motion-sensitive trigger that will execute if player haven't pressed WALK or DUCK key.
IF_PRESSED
— flipeffect will continue execution only if specified key is pressed.
IF_NOT_PRESSED
— flipeffect will continue execution only if specified key is NOT pressed.
Possible keys are: ACTION, JUMP, DRAW, ROLL, USE_FLARE, DUCK, SPRINT, WALK, LOOK, LEFT, RIGHT, BACK, FORWARD
Example:
STOP
IF_PRESSED ACTION
PLAY_ANIM
448
This flipeffect will play animation #448 only if player pressed ACTION key. Note that you must create one-shot flipeffect with mode: post selected.
***
Low-level conditional directives
Low-level conditional
directives are not connected to some specific Lara's state or any other condition
or variable. Instead, these directives allows you to use ANY TR4 variable with
fixed address (air amount, sprint energy amount, ammo, time taken, secrets
found etc.) as a condition. You must note that such variables can
be BYTE (0-255), WORD (0-65535) and DWORD (0-4294967294).
You must use corresponding command for each variable according to given variable
type.
Here is the list of
these conditional directives.
BYTE_IF= [ADDRESS] [SIGNEDBYTE]
If BYTE value at [ADDRESS] equal to [SIGNEDBYTE], then execute flipeffect.
BYTE_IF!= [ADDRESS] [SIGNEDBYTE]
If
BYTE value at [ADDRESS] NOT equal to [SIGNEDBYTE], then execute flipeffect.
BYTE_IF> [ADDRESS] [SIGNEDBYTE]
If
BYTE value at [ADDRESS] MORE THAN [SIGNEDBYTE], then execute flipeffect.
BYTE_IF< [ADDRESS] [SIGNEDBYTE]
If
BYTE value at [ADDRESS] LESS THAN [SIGNEDBYTE], then execute
flipeffect.
BYTE_IF<= [ADDRESS] [SIGNEDBYTE]
If
BYTE value at [ADDRESS] LESS OR EQUAL TO [SIGNEDBYTE], then execute flipeffect.
BYTE_IF>= [ADDRESS] [SIGNEDBYTE]
If
BYTE value at [ADDRESS] MORE OR EQUAL TO [SIGNEDBYTE], then execute
flipeffect.
WORD_IF= [ADDRESS] [SIGNEDINTEGER]
WORD_IF!=
[ADDRESS] [SIGNEDINTEGER]
WORD_IF> [ADDRESS] [SIGNEDINTEGER]
WORD_IF<
[ADDRESS] [SIGNEDINTEGER]
WORD_IF<= [ADDRESS] [SIGNEDINTEGER]
WORD_IF>=
[ADDRESS] [SIGNEDINTEGER]
DWORD_IF= [ADDRESS] [LONG]
DWORD_IF!=
[ADDRESS] [LONG]
DWORD_IF> [ADDRESS] [LONG]
DWORD_IF<
[ADDRESS] [LONG]
DWORD_IF<= [ADDRESS] [LONG]
DWORD_IF>=
[ADDRESS] [LONG]
^ All these WORD and DWORD directives are the same use, except they are used for WORD and DWORD variables.
***
9.3.: How to create ELSE_IF sequences with conditional directives
Since Flipeffect Editor and FURR Language deals with raw assembly language sequences (i. e. it's not high-level compiler), you can't create ELSE_IF conditions within one flipeffect. However, you CAN create two flipeffects with different conditions for one parameter and then place them onto one square. Then, engine should execute only one flipeffect with proper conditions and ignore other flipeffect(s).
***
Command list can be extended with
user-defined commands by editing SYNTAX.FLN file. Also in same file you
can declare any constants of specific types.
All information about adding
commands and declaring constants available in language reference bundled with
TREP.
10.0.: Race Timer Editor — bringing thrill to your levels
Let me begin this part of our manual with a lyrical digression.
Alien
You think it's absolutely not possible
to create same situation in TR4 engine?
You're WRONG!
Moreover, you don't
need any rolling balls, flying saucers, walking dead and other complicated things to achieve this. All you
need is edit good old TR4's race timer.
Race Timer Editor allows you to edit these
basic parameters:
Invert race timer. In other words, timer
will be counting down. In combination with START_TIMER_FROM command in
Flipeffect Editor, you can set up timer to certain time and then count time
down.
Timer becomes visible at: change
the time when timer will actually show on-screen. For example, by default it's
60 minutes. If timer will reach 60:00 mark, it will be hidden from your
eyes. Despite this fact, TIMER WILL STILL WORK. With this trick, you can create
«invisible» countdown, which becomes visible only when in critical
state (for example, only 5 minutes left).
Timer font effect ID: style
of timer. By experimenting with this value you can create yellow or red timer,
like in Resident Evil games.
Race Timer Editor hotkeys
F1 — opens command list for quick reference.
F2
— brings up navigation box (you can quickly navigate through timer events
with it)
F3 — initiates spellcheck for current
timer event.
***
Before using this option, don't forget to turn on «Extend tomb4.exe size» option in main TREP window.
At last… With this
option, you can do almost everything you want with your race timer. How? Let
me explain.
Main purpose of Race Timer Editor is to assign ANY COMMAND to
ANY TIME VALUE. For example, you can create Race Timer Event that will play
audiotrack #90 when timer will reach 05:00. Or you can create event that will
kill Lara if Timer will count down to 00:00!
How it works?
Race
Timer Editor uses SAME COMMAND SYSTEM AS FLIPEFFECT EDITOR. I.
e., all commands that are listed above in Flipeffect Editor Command Reference,
are applicable to Race Timer Editor!
By default, Race Timer editor
allows you to assign 100 various events for race timer. To change currently
editing event, select desired number in Event number combobox.
If
(but how?..) you've filled all 100 timer event slots, you can increase slot
amount in config file. Find RaceTimerSlots=100 line in trep.cfg
and set it to anything you want.
In Race Timer Editor, each timer event has a few parameters:
If race timer
value = …
Maybe it's most important parameter. It specifies time value
for current race timer event. In other words, when race timer will reach this
time value, corresponding event code will be executed.
Please note that seconds
textbox allows you to enter not only whole numbers, but also fractional numbers.
Therefore, you can specify fraction of seconds.
Example: 234:48.4
NOTE:
Gray text in square brackets is calculated RAW value. You can use this
value to see immediate result of your manipulations with time values.
Then…
Two
text fields — small (description) and large (event code itself). All in all,
look of this window almost the same as with Flipeffect Editor. As
it was already said above, event code commands are completely similar to Flipeffect
Editor commands (which is listed in syntax.fln file). I. e., you can use same
KILL_LARA, DEC_HP, SHAKE_CAMERA etc. commands. Good to note that in any
case, Race
Timer Editor ALL EVENTS ARE ONE-SHOT EVENTS. I. e. they cannot be continously
applied to certain time span — only to a UNIQUE TIMER VALUE. This difference
between Flipeffect and Race Timer editors allows you to use same commands with
other purpose. For example, since DEC_HP becomes one-shot, you can use this
command with large parameters (for ex., DEC_HP 500) and thus remove certain amount
of HP from Lara at the certain time.
EXAMPLE
OF RACE TIMER EVENT:
When race timer value
= 0 min 0 sec…
Then:
KILL_LARA
FLASH_ORANGE
PLAY_SAMPLE
106
PLAY_ANIM 438
SHAKE_CAMERA_HEAVY
This timer event will kill Lara like she was blown up in a self-destruction mayhem — it will remove all HP, flash and shake screen, and also play explosion sample and blown-up animation when timer reaches 00:00 (you must invert race timer and initialize it with START_TIMER_FROM command to do this successfully).
10.2.:
TRICK: How to create one-shot flipeffect with Race Timer Editor and Flipeffect
Editor
If you find Flipeffect Editor one-shot capability too buggy and still want to get rid of continously executing flipeffect, you can combine both Racetimer and Flipeffect editors to execute desired flipeffect only once. This procedure requires a bit of patience, so listen carefully.
As you already know, Race Timer will be hidden from you, if time value is more than threshold. You can wisefully use this option to create dummy «timer zones» for various purposes, and player even won't notice that something happened.
Example: let's suppose
you want to activate FLASH_GREEN command once. If you will do this as always
in Flipeffect Editor, green flash will continously pulsate until player will
leave trigger sector. So, to create one-shot flash, you must combine both Racetimer
Editor and Flipeffect Editor.
Create new trigger in Flipeffect Editor and
enter these commands:
START_TIMER_FROM 100:39.99
STOP
RETN
Then go to Racetimer Editor and create new event with these parameters:
If race timer value
= 100 min 40 sec
Then:
FLASH_GREEN
Now, when you
will step onto your new flipeffect, timer will start from 100:39.99. But almost immediately
after timer will begin to work, event from Racetimer Editor will be activated.
It will flash screen only once.
Don't forget to set-up another flipeffect
trigger near your main trigger, which will stop timer!
You can create a lot of such «dummy timer zones», since TR4 can handle big timer values.
11.0.: DRACO custom patch module
Main article: DRACO patches reference
Despite the fact that after about
9 months of TR4 engine research ~500 different options were documented,
there are still many people who are bringing us something really new and
unique, like rain or snow patches, various object behaviour changes etc. etc.
Also, a lot of requests were posted in various TR forums, and it is absolutely
not possible to complete all of these requests just because if TREP will contain
ALL requested options, there will be hell lot of a checkboxes, textboxes and
various other controls, which will make user interface hypertrophied and ugly.
Moreover, releasing new TREP versions one after another each half of week may
be a even bigger problem for the author.
To overcome these problems and also to allow
creation of user-defined, custom patches without releasing any custom tomb4.exe
files and/or fourth-party standalone patchers, DRACO module was created. In
other words, function of DRACO module is to create, organize and operate
various code patches without editing TREP source code and without
using any extra utilities or releasing custom tomb4.exe files.
12.0.: Advanced scripting with TREP
Main article: eSSe scripting reference
Since early days of TREP development, a lot of TR level builders asked if it is possible to make most useful TREP parameters level-specific. It was not possible until recent time, but now it should completely change. Do you know why? Listen up: now you can create advanced script file that will be able to handle ANY TR4 engine code, change ANY parameters on the fly and support ANY POSSIBLE additional parameters. As with DRACO module, if you're skilled enough, you can create YOUR OWN script entries of any type or change add-on script file structure — to do this, use small utility called eSSe — Extended Script / String Editor.
|
TREP is freeware and not a registered trademark and is not protected by any moronic copyright laws. |
